It was 44 degrees outside when we got up this morning but cozy in the house. We were out of Linda’s homemade granola so we had oatmeal for breakfast. It’s a nice change of pace on occasion and was a hot, hardy start on a chilly day. I made a pot of Sweet Seattle Dreams coffee and we had a quiet morning in the living room. We talked about going to the Howell Farmers Market, as today is the last day of the 2015 outdoor season, but did not need anything and given the temperatures decided not to go. I changed into my work clothes at 10:30, went out to the bus, and turned up the thermostats to raise the interior temperature.
My focus in the bus today was tasks that I could not do alone. I got my 15/16ths closed-end ratcheting wrench and removed the main retaining nut from the driver’s seat and from the front passenger seat. Each of these nuts threads over a vertical stud that is fixed to the pedestal/riser which is in turn bolted to the floor. In between the top of the riser and the bottom of the 6-way power base is a ball-bearing swivel plate which is centered on the mounting stud. To get to these nuts I had to move the seats forward using the motorized bases and reach in from behind but I had good access and the nuts were not hard to loosen and remove. I bought this closed end ratcheting wrench specifically for removing/installing these seat mounting nuts and it was worth every penny I paid for it.
With the nuts removed I unplugged the 12V DC power supply wires to each seat. Linda and I were then able to lift the seats off of the pedestals without too much difficulty, carry them back into the kitchen (of the bus), and lay them down on their backs on the floor, which was protected with blankets.
The reason for removing the seats was two-fold:
- We were going to hang wallpaper on the living room walls where they merged into the cockpit and needed better access to those areas, and
- I plan to tile the floor and walls in the cockpit and entry this coming week and needed these seats out of the way in order to be able to do that.
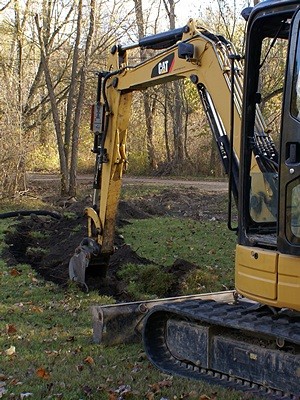
Our next task, preparatory to hanging wallpaper, was to remove the walnut cover (half box) from the front eight feet of the passenger side OTR HVAC duct and wiring chase. We set it across the two seats we had just removed to get it out of the way.
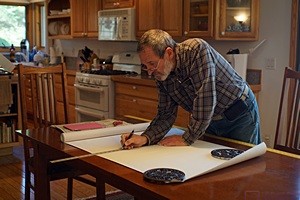
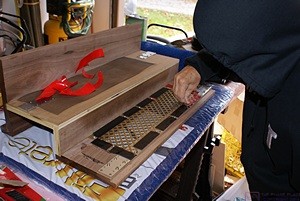
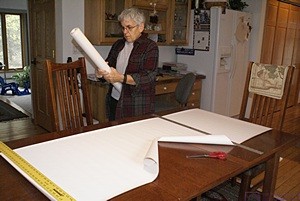
Bruce marks a piece of wallpaper on the dining room table in the house before cutting it.
When we were finally ready to start wallpapering we needed three relatively short pieces; two to finish the driver side and one to finish the passenger side, at least as far as we intended to go. I made a sketch for the shape of each piece, took measurements, and added them to the sketches. The wallpaper is 26.5″ wide on the roll and the longest piece we needed was only 24″. I got the 3′ and 6′ rulers from the shop while Linda got the roll of wallpaper. We used the dining room table in the house to measure, mark, and cut each piece. Although relatively small these pieces took some additional, careful, attention because they had to fit over, under, and around cabinets and window trim. To make the installation easier I trimmed away as much of the waste material as possible before hanging the piece.
Linda partially filled two 5-gallon buckets with water, added soap to one of them, and brought them out to the bus while I retrieved the paint tray and liner and the 6″ pasting brush. We laid out all of the wallpaper tools, put a towel on the floor, and set the paint tray/liner on the towel. I poured the amount of wallpaper paste I thought we would need into the tray and started with the piece of wallpaper at the right end of the built-in sofa (towards the front of the bus).
As we had done previously everywhere else in the bus I applied the paste to the wall rather than to the back of the wallpaper. The wall behind the sofa had been primed but the small strip above/behind the end cabinet and around into the cockpit had not been, so I used more paste in the unprinted areas. This first piece required a lot of trimming so it took a while to hang but it looked good when we were done. As I got each piece installed, with Linda’s help, she rolled the seams and then washed off the excess paste with a large sponge using the soapy water followed by a second sponge with clean water.
We continued along that wall towards the front of the bus with the second piece. It did not require as much trimming as the first piece and went in a little faster and easier. I overlapped the thin strip above/behind the cabinet with the first piece and cut through both of them to create a clean, tight seam. When we hung wallpaper in our house many years ago all of the seams were done by overlapping adjacent panels and cutting through both pieces. The paper we are using in the bus, which is actually vinyl, is installed by butting the factory edges together. This certainly simplifies installation, and speeds it up a bit, but it is harder to get a perfect seam. Still, it was the right choice for our motorcoach as it is washable and scrubbable and goes very well with the interior.
On the passenger side of the coach I pasted up the last section of the living room wall and part of the small section of wall under the trim on the window next to the front passenger seat. I ended up cutting off a small part of this piece and installing in separately as the trimming required was intricate and awkward to do.
After installing the two parts of this third piece we decided to go ahead and paper a small triangular section of wall above the bottom window trim. I got a scrap of wallpaper from the house that was big enough to cover the right triangle shape and cut it approximately to size. I pasted the wall, set the bottom edge flush to the sill, pressed the back edge into its vertical corner, and trimmed off the excess. This little section of wall was capped by a piece of walnut that ran at an angle along the bottom edge of the glass. I trimmed off the paper at the bottom edge of the wood trimmed and tucked the paper in under the walnut.
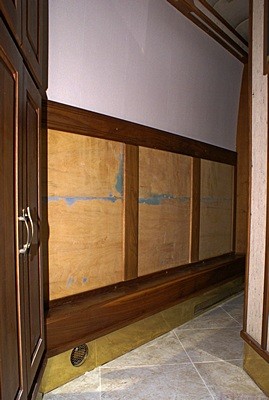
The reason we did not wallpaper all of the small wall section below the window is that part of the plywood wall is severely water damaged and a piece of it rotted and is missing. There is no practical way to replace the plywood and the only practical way to repair this area is to panel over it. We could use thin plywood and wallpaper it but we have enough of the 1/4″ walnut veneered plywood that we salvaged from the old refrigerator to panel this area.
We were done with the wallpapering by 2:30 PM. Linda cleaned off most of the tools and then took the two buckets of water out of the bus to pour them out and clean them. I took the paint tray/liner, pasting brush, and some of the tools to the laundry room and cleaned them. There was very little paste left in the tray liner so I had estimated quite closely on the amount I needed for today’s work.
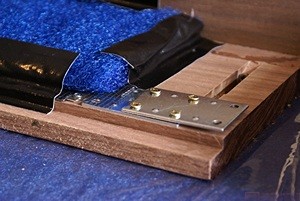
The swivel mechanisms for the two front seats consist of two rings separated by ball bearings and interlocked around the inside edge. They have an ‘A’ side and a ‘B’ side and one of them was installed ‘A’ side up and the other ‘B’ side up. They also have a large washer. The driver seat was installed with the washer between the swivel bearing and the power base. The passenger seat had the washer directly beneath the retaining nut inside the power base. Given these differences I could not tell the correct orientation and order of assembly by casual inspection of the pieces involved. It is possible that the swivel plates are, in fact, symmetrical and thus can go in either way, but one of the washers had to be in the wrong place.
My interest in all of this was motivated, in part, by the fact that both of these seats have always wobbled since we bought the coach. The new seats are firmly attached to the power bases which seem tight but may have some play. I was suspicious of the swivels, however, as the main source of the play. I studied the design for a while and came to some tentative conclusions.
When the swivel plates are installed the ring on the bottom (that sits on the pedestal) is not going to move as the pedestal is bolted to the floor. The top ring, which will be in contact with the power base, is going to move relative to the fixed bottom ring when the seat is tuned. I decided that the larger ring, which wraps around the inside edge of the smaller ring, should go on the bottom. With regards to the washer it seemed to me that it should go directly under the retaining nut, allowing the power base to swivel relative to the nut without loosening it. Further, placing it between the swivel plates and the power base would potentially prevent the base from fully resting on the swivel plate and allow the whole seat to wobble.
I will examine all of this again more carefully when we are ready to reinstall the seats. For now, I took the two swivel bearings to the garage to clean and lubricate them. After wiping them off I sprayed them with WD-40, worked them around, and wiped them off again. I then sprayed them with garage door lubricant, worked then around again, and wiped them off. Finally, I worked Red Tack ‘grease’ into the ball bearing race, spun the rings to distribute it evenly, and the wiped the outer surfaces clean. After cleaning the grease off of my hands I took the swivel plates back to the bus, wiped the pedestal plates clean, and set them back in place.
We quit working around 3 PM so Linda could cut my hair and beard. I then shaved, showered, and got dressed for dinner. Linda showered after me but was dressed and ready to go before I was. We made plans yesterday to meet Bruce (W8RA) and Linda (K4YL) at Carrabba’s in Novi at 5 PM for dinner. We left at 4:30 and arrived in Carrabba’s parking lot just after 5.
The parking lot was not full so we knew there would not be a wait for a table. Bruce and Linda were already there and had opted for a booth. The booths will seat six adults so they have more table space than a table for four. They also offer a bit more privacy for conversation in an otherwise not very private setting.
Carrabba’s had changed its menu since we were last here. The one dish they had before, Tag Pic Pak (seriously), was no longer on the menu. It was Linda’s favorite dish and one of only two that we could eat. They had something with a different name that the waitress said was the same but it included chicken. She said they could leave the chicken out but the price would still be $14.95. The Tag Pik Pak was $10.95 as I recall. We have come to resent paying for animal products that we don’t eat. Linda ended up getting whole grain spaghetti with Pomodoro sauce and I got whole grain spaghetti with olive oil and garlic. Linda said the sauce lacked flavor. My dish was “off menu” and was unimpressive. Our salads, dressed with vinegar and oil, were OK and the bread was very tasty. Linda had a glass of wine and I had blackberry sangria. Sangria is Spanish, not Italian, but it was good. The meal overall was disappointing but we had a great time chatting with Bruce and Linda over dinner. The manager stopped by to ask how our meal was (as a courtesy) and ended up having to talk to us for 20 minutes.
Back home Linda made vegan banana nut muffins. The organic bananas we bought at Meijer’s two days ago must have been bruised because they were going bad very quickly. Banana bread or muffins was a great way to salvage what we could. While she made the muffins I went to my office, checked e-mail, and off-loaded the photos we took today.
At 8 PM I turned on the Yaesu FTM-400 ham radio and participated in the SLAARC Info Net. When the net was over I came back upstairs, reviewed the items in my B&H Photo shopping cart, and placed the order. I then spent a little time researching DC distribution panels on the DX Engineering website and doing a Google search for cantilevered table supports and legs. We each had a muffin for dessert and went to bed at 10 PM. I put on the Detroit PBS Create channel, turned down the volume, and worked on this post for a while before finally going to sleep.