Monthly Archives: April 2023

20230220 – Accessory Building Project Update

[ This post is mostly photos with captions. ]

MONDAY 20 February

The barn as seen from the southeast.  The trench with the conduit for the service conductors still needs to be completely filled in.  The green(ish) bags along the edge of the driveway are top soil.

Although we were still involved in final packing decisions for our cruise, it was a reasonably nice day, weather-wise, so I took a few more photos of the new barn doors and the daytime light levels in the barn with the doors closed.  We zoomed with Paul and Nancy at 5:30 PM, to compare notes and see if there was anything any of us had forgotten to pack for our upcoming cruise.


The inside front half of the barn, with the doors closed, as seen from the landing at the top of the stairs to the storeroom.  The 12,000 Lumen ceiling light and the light over the entry door are both turned on. The bottom seals on the roll-up doors are slightly off the concrete to allow them to relax and expand.


The large/west RV bay as seen from near its roll-up door.  All of the doors are closed.  The 12,000 Lumen ceiling light and the light over the entry door are both turned on.


The small/east RV bay as seen from near the entry door.  All of the doors are closed.  The 12,000 Lumen ceiling light and the light over the entry door are both turned on.


The Barrina 2’ integrated LED strip light under the stairs is turned on.  In general, the light levels were adequate with this minimal amount of lighting supplementing the daylight coming in through the windows and sun tunnels.  With RVs in the two bays, however, additional lighting will be needed.


202302(16-18) – Accessory Building Project Update

[ This post is mostly photos with captions. ]

THURSDAY 16 February

This is how the roll-up doors were packed for shipping.  They were made in Missouri and shipped to West Virginia by mistake.  Dan (from Everlast Doors & More) chose to drive to West Virginia to get them, rather than delay the installation by some unknown number of additional weeks.

It was a BIG DAY today.  Dan, from Everlast Doors & More, showed up with the two large roll-up doors for the barn!  Chuck (the builder) arrived shortly thereafter to help Dan with the installation by operating the Pettibone Telehandler.  The telehandler was used to unload the crates from Dan’s trailer and then to lift each door into position while Dan secured the mounts on each end from a ladder.


One of the doors has been removed from the trailer by the telehandler and is being moved into the large/west RV bay.


One of the roll-up doors positioned in the large/west RV bay, ready to be uncrated.


The chain drive box for a roll-up door.


The main ring gear on one end of a roll-up door tube.


A shaft support and tensioner on the opposite end of the roller tube from the ring gear.


A chain drive box mounted on the ring gear end of the roller tube.


The other roll-up door being lifted into place.  It is supported by a small section of the original shipping crate to allow the telehandler forks to get under it, and is strapped down to hold it in place.


The small/east RV bay roll-up door (on the left in this photo) is installed.  The large/west RV bay roll-up door is being lifted into position with the telehandler.  The telehandler weighs 28,000 pounds, so Chuck (the builder/operator) kept it off of the poured concrete at all times.


Dan is securing one end of the large/west RV bay roll-up door to the vertical steel support and bracket.


FRIDAY 17 February

The weather forecast for today was for cold temperatures and light icing.  I texted Dan early and suggested that he not finish the doors today.  He appreciated that, and said he would be out around noon tomorrow to continue the installation.


SATURDAY 18 February

Dan works on the chain drive end of the small/east RV bay roll-up door.

Good to his word, Dan was back around noon and put in a long afternoon finishing the installation of the two big roll-up doors.  He did not like the weather-stripping that came with the doors, and wanted to come back late next week with a different product and finish up.  He would also finish installing the lag screws for the side channels at that time.  (As it turned out, the weather stripping did not get installed until mid-late March, but that’s for another/later post.)


Dan checks the small/east RV bay roll-up door for proper operation.


The large/west RV bay roll-up door in the closed position.


The barn finally has all of its doors and is now closed in and can be secured.


20230215 – Accessory Building Project Update

WEDNESDAY 15 February

The Hyperlite light fixture is the small gray object top center in the photo.

The Motor Cities Electric Utilities crew was here today to replace the utility pole in the SE corner of our property, but that work was not directly related to the barn project, and I covered it in a general post for February 01 – 21.

The other thing that happened today was I bought an appliance cord (pigtail) and wired up the Hyperlite outdoor LED fixture that I recently bought on Amazon.  This is a 40W, 5,200 Lumen, 5000K integrated LED light fixture.  I mounted it above the entry door inside the barn so I could test its intensity and beam spread.  Besides possible use on the outside of the barn, I was planning to use these fixtures for interior lighting along the outside edges of the RV bays.  They come in 60W and 100W versions, but I will use more of the lower wattage / lower lumen units for better, more even coverage.


The Hyperlite light fixture has two parts with a hinge design that allows them to be separated for installation.  This is the base unit of the light fixture mounted to a framing member above the entry door.  The WAGO lever-nut connectors have been installed on the pigtail power cord.  It has the weathertight seal that goes between the two parts.  The lamp head is adjustable from 0 (straight down) to 90 degrees (straight out) and contains the electronic module and wires for connecting to the incoming power.  The base unit has five (5) access holes with weathertight plugs for getting power into and out of the box.  It has provision for mounting screws in the back and a built-in bubble level to aid in the installation.  It’s listed on Amazon as a commercial unit, and the construction appears to merit that description.


The lamp head has been set onto the hinge pins of the base and the wires connected via the WAGO lever-nuts.


I finally got a chance to test the 12,000 Lumen light fixture at night.  It made a LOT of light!


One of the Barrina 2’ LED strip lights lit up the area under the stairs quite nicely.

In addition to the 12,000 Lumen ceiling light fixture, and the light over the entry door, I bought two Barrina 2’ LED strip lights from Amazon to test.  These are 20W, 2,500 Lumen, 5000K integrated LED fixtures that I plan to use for the ceiling lighting in the shop and storeroom.  (They also have a 4’, 40W, 5,000 Lumen version.)  For testing purposes , however, I mounted one of these under the stairs/landing, where it will likely remain.  They came with plug-in power cords, so I used one to plug the fixture into an extension cord with multiple receptacles.  They also come with pigtail cables for direct wiring (via an outlet box) and 4’ connector cables, that allow them to be connected end-to-end, only requiring one power feed to an entire string of fixtures.


The is the large/west RV bay at night.  With nothing in the bay, the 12,000 Lumen ceiling fixture by the entry door lights up the entire space surprisingly well.  The two strip lights under the stairs are also on, and the Hyperlite light over the entry door is probably also on.


This photo was taken from the right/east RV bay door.  The main light source is the Hyperlite fixture on the wall above the entry door.  The light under the stairs is from one of the Barrina 2’ LED strip lights.


202302(07-10) – Accessory Building Project Update

Winter was still with us, and seemed unable to make up its mind as to whether it would hang around for a while or depart the Great Lakes Region earlier than usual.  Although we finally had electrical power to the barn, which was a huge deal, the big roll-up doors were not yet available for installation, which meant the building was not yet truly weather tight.


TUESDAY 07

As I mentioned in the regular post for February 01 – 21, we picked up the 14’ Werner 2-sided step ladder from Lowe’s a few days ago.

The new 14’ stepladder and 12,000 Lumen light fixture.  The light fixture is being powered from an extension cord plugged into the one duplex receptacle that was installed by the electrician as part of the service entrance. The bottom cords of the roof trusses are 16′ above the floor.

As I mentioned in the regular post for February 01 – 21, we picked up the 14’ Werner 2-sided step ladder from Lowe’s a few days ago.  I managed to get the new ladder opened and raised into position by myself, but going forward I plan to always have someone help me put it up, take it down, and move it around, unless I can find a wheel kit for it.  Otherwise, it’s really too much ladder for one person to handle safely.  I used it to hang a 120-Watt, 12,000 Lumen, 5000K integrated LED flat panel light fixture that I bought a few weeks ago at Rural King.  I had already attached the plug cord that came with it, and wanted to test the beam pattern and brightness when it was suspended just below ceiling height (about 15’6”).


WEDNESDAY 08

The dually tire tracks leading into the drainage ditch.

When the snow had melted, I discovered that one of the utility trucks had driven into the ditch along the road where the new pole was stored, and driven back out right over the end of the culvert under the driveway, partially crushing it.  Ugh.  I took photos and e-mailed a couple to the case manager who had been assigned to our project and asked what, if anything, DTE might be able to do about this.  Other than not ever getting advanced notification when crews would be here working, this was the only damage that had occurred to our property during the whole project.  And the culvert wasn’t crushed shut, so it could still drain, but this damage should not have occurred.

The dually tire tracks in the drainage ditch clearly headed up and over the end of the culvert into the gravel driveway.

Sometime after that, but still in the first two weeks of the month, I got another customer satisfaction survey from DTE.  This one acknowledged that the project to replace the pole/transformer and get power to the barn had been completed, and asked for feedback.  So, I provided it.  Well, once again, I got a call from a customer service representative.  In fact, it was they same women I had chatted with the first time.  My complaint by that point was that the case manager had not replied to my e-mail, even though the last communication I got from her said to contact her if there were any remaining issues.  She said she would escalate that and check on the other pole that was sitting in our yard.

The top center of this photo is the east end of the culvert under the driveway.  A little bit of the metal is visible, but the top was squashed down and it is mostly covered and filled with mud.


FRIDAY 10

The builder’s Pettibone Telehandler on site, waiting to help install the two large roll-up doors.

Although it took some doing, the builder (Chuck) managed to get his Pettibone Telehandler relocated from a jobsite in Washtenaw Country to our driveway in front of the barn.  This machine weighs about 28,000 pounds and has to be moved by a tractor on a flatbed equipment trailer.  Chuck has a guy he uses for this work, and today was they day they were able to get it arranged.  The telehandler will be needed to install the two larger roll-up doors, which are now in the possession of Everlast Doors & More, the local company through which they were ordered, and who will install them (with Chuck’s assistance).


202302(01-21) – General Update (not the barn project)

WEDNESDAY 01 February — TUESDAY 21 February

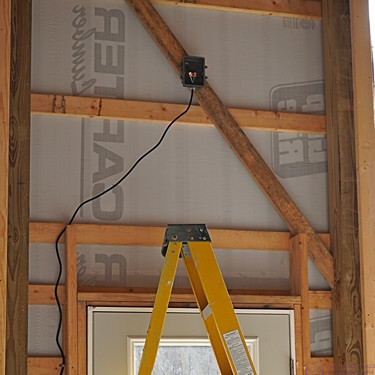
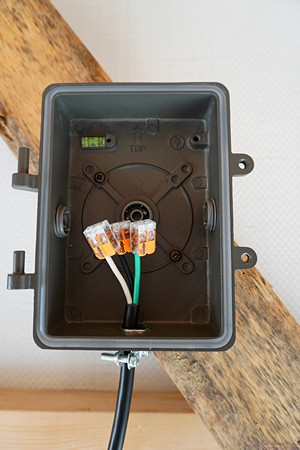
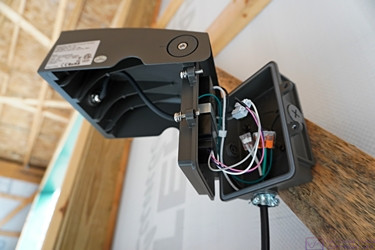
Although this post is not (primarily) about the barn project, I did spend a lot of time during this period working on the electrical plan and researching devices, particularly lighting fixtures.  Happenings specific to the barn project will be covered in separate posts following this one.


WEDNESDAY 01

 I decided to buy a new digital camera for our upcoming Panama Canal cruise on the NCL Joy with our friends (and RV travel buddies) Nancy and Paul.  I wanted something small and light but good quality.  My birthday was just a few days away, so that was my additional “justification” for buying it (not that I really needed one).  After weighing various factors, including cost, I settled on a Sony a6400 with a 16-50 mm E-mount zoom lens.  I placed the order with B & H Photo Video, which has been my go-to place for photography equipment for a while now.

This will be my third Sony digital camera, and I have been very satisfied with the first two; a DSLR-a100 and a DSLR-a99.  ABIR, the DSLR-a100 was Sony’s entry into the digital camera space in 2006, having absorbed the Konica-Minolta A-mount system and lenses.  I have a fairly complete Minolta 9000 35mm film camera kit, and the fact that I could use my existing lenses with this new Sony camera was a big decision factor.  The only limitation was the 10 Mp APS-C sensor.  Besides the inherent resolution, this also meant my lenses produced more magnification than on a full-frame 35mm body.

I used the a100 a lot and eventually bought the DSLA-a99.  This was Sony’s highest end body at the time, with a full-frame (36mmx24mm) 24 Mp sensor, but maintaining the A-mount system.  Both of these bodies are true SLR designs, with flip-up mirrors.  The a99 is large and heavy, especially with the additional bottom-mount battery pack (like the motor drive attachments of old), but I like the way it feels in my hands.


FRIDAY 03

The new camera arrived today.  The a6400 has an APS-C sensor (25.1mm x 16.7mm) with the same 3:2 aspect ratio as a full-frame 35 mm sensor (36mm x 24mm), so it presents an image format with which I am familiar and comfortable.  That said, it is definitely small and light weight.  Significantly, it has a 24 Mp sensor, so the same resolution as my a99!   Also, the 16-50mm zoom lens provides the same field of view as a 24mm-75mm zoom lens on a full frame sensor camera.  This is similar to the range I have on my Sony/Zeiss 24mm-70mm zoom lens, which I use with the Sony a99 most of the time.  The kit lens is not of that quality, of course, but I am looking forward to the images I get from the new combination.  I still like my Sony a99, and I absolutely love my Sony/Zeiss 24mm-70mm zoom lens, but the combination is heavy, and I felt it was too much camera to take on this particular cruise.

The big tradeoff, of course, was the E-mount system for the lenses.  But it’s not like I had a choice within the Sony product line as Sony had officially abandoned the A-mount system sometime after I purchased the.  (The did bring out an a99-ii with a 42 Mp sensor, with a year of when I bought the a99, but the price was just too steep for a hobbyist.  Still, in retrospect I wish I had bought it.)  The other major difference (besides price) was that the a6400 is a “mirrorless” camera; the viewfinder, like the rear screen, is just a small monitor.  Again, this has it’s good and bad points, and the web, including Youtube, is cluttered with articles and videos that get into all of this.


SATURDAY 04

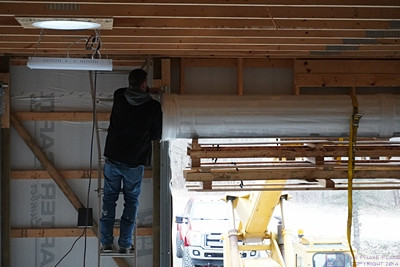
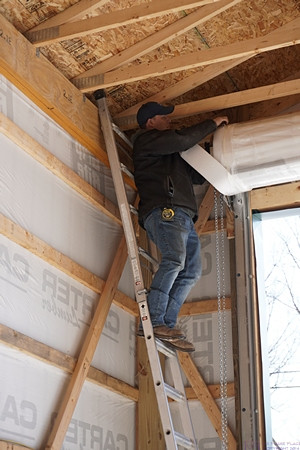
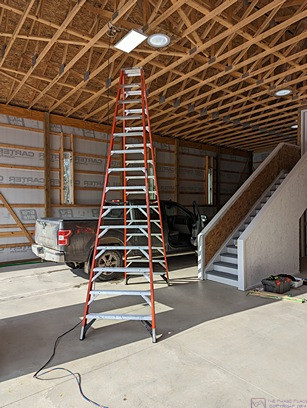
My birthday was on Saturday and the 14’ Werner Twin (2-sided) step ladder that I order from Lowe’s on December 3rd finally arrived at the store, so Linda and I went to pick it up in the F-150.  In order to carry it home, I had to move and re-secure the three large Rubbermaid tubs that collectively hold about 300 pounds of sand to add weight to the drive axle during the winter.  I needed to create a space in the center of the truck bed to allow the narrower top end of the ladder to sit in the bed (vertically) all to way to the front wall behind the cab.  Even then, with the tailgate down, the lower half of the ladder hung out way past the end of the lowered tailgate.  We took additional ratchet straps and large rubber bungee cords to lock it in place, and tied red plastic flags on the protruding end for the short trip home.  The ladder was strapped closed along with two packing boards.  As delivered, it weighed 86 pounds, and the combination of size and weight was quite a handful for the two of us.  But I have a lot of wiring to do in the barn, some of it 16 or more feet above the floor.  I did not want to do that with an extension ladder, and the only one we have is the Little Giant aluminum convertible unit that can be configured as a 14’ extension ladder.


SUNDAY 05

We had the family over for brunch to celebrate my birthday.  It’s always lovely when the entire immediate family is able to gather.


WEDNESDAY 15 February

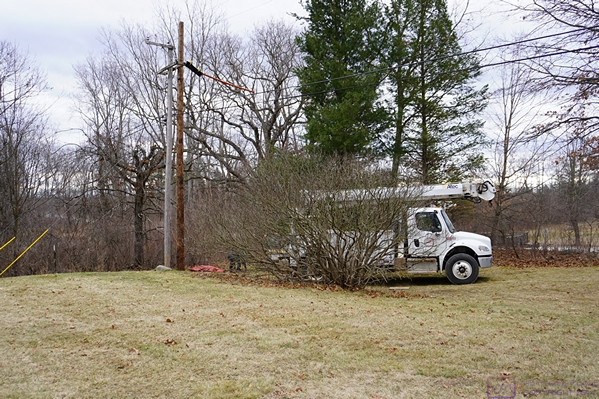
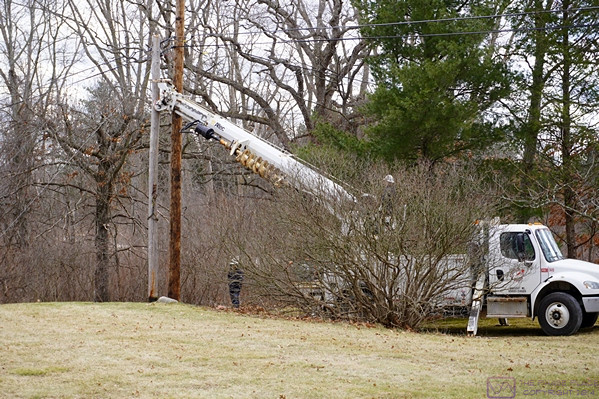
The Motor City Electric Utilities boom truck in the SE corner of our yard.  The new utility pole (on the right) is already in the ground.


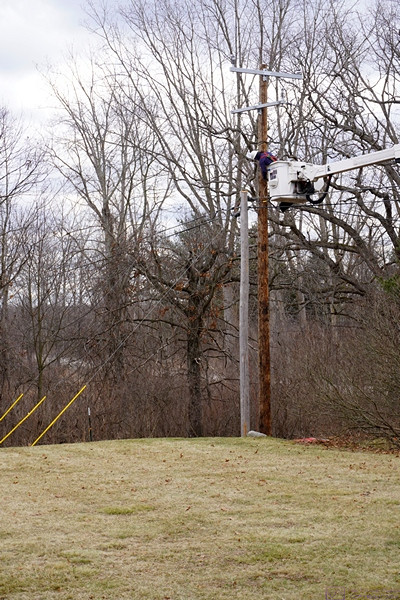
The wires have been moved to the new utility pole and the old pole has been “topped” in preparation for removal.

It turned out that the crew from Motor Cities Electric Utilities showed up this morning to replace the pole in the SE corner of our property.  In fact, it was same crew that was here in January to work on the pole for the house/barn and then started to work on this other pole before deciding to leave.  This pole replacement was NOT part of the barn project, however, but a regular maintenance item intended to replace an old pole with a new/taller one, with the added benefit of helping raise the lines across our driveway a bit higher.  (The new pole for the barn is also taller than the old one, and also helped raise the wires across our driveway and where they cross the street to the SW corner of our property.)


While they were working, I got a call back from the C/S person at DTE.  She had checked on this pole, and found out it was not a DTE work order, and had (probably) been initiated by either AT&T or Comcast (those would be the other two choices).  I thanked her for checking into this and getting back to me, and let her know that a contracted crew was here doing the work.  What surprised me about this was that I was under the impression that the utility easement was granted to DTE Energy, that the utility poles belonged to them, and that all other users “leased” access on the poles from DTE.  But then, the gas line that was run through our subdivision in 2013 is owned and operated by Consumers Power, and it was installed in the same utility easement, so perhaps I don’t correctly understand the arrangement(s) between these various companies viz-a-viz the rights to use the easement.


The old utility pole being lifted out of the ground by the crane on the boom truck.


As I thought about all of this, I remembered that back in October, but sometime after I had initiated the work with DTE, someone was walking down the street checking all of the utility poles.  I presumed he was working for DTE, but perhaps he was there on behalf of all of the utilities that use these poles.


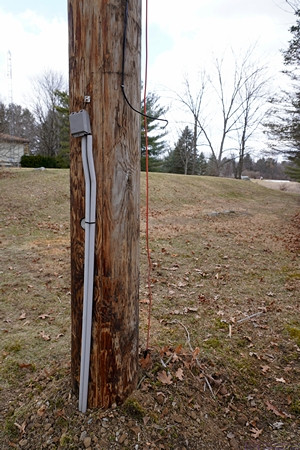
The AT&T terminal box (gray) and the Xfinity broadband cable (orange) relocated (temporarily?) to the new pole.  I have no idea whether DTE communicated with AT&T about this, but it was suggested to me that I would like have to submit a request to have this dealt with and “pester” them until it is taken care of.  For that matter, I suspect that the Motor Cities Electric Utilities crew closed out their job on the secondary pole, but I don’t know who with, and whether or not they notified Comcast/Xfinity, as our broadband cable comes from this secondary pole, and it looks to me like they should (need to) come tidy it up as well.  So, I don’t know much, but I do know this, the crews that dealt with the poles and the power lines, made it clear that they are not allowed to do anything with the phone and broadband cables, other than move them out of their way and re-secure them as best they can.

SUNDAY 19

No barn work today.  Linda had already been packing for our upcoming cruise, and it was time for me to get serious about doing the same thing.


TUESDAY 21


We made our final packing decisions for our trip this morning and, just after lunch, checked-in online for our flight to Los Angeles tomorrow.  I spent the afternoon finalizing blog posts for December 2022, our trip to Disney World and Universal Studios over the holidays, and the electric utility work that took place in January 2023.  I had all of those uploaded by 4:30 PM and was done with blog posts until after our cruise.