I got up at 8 AM, put on my robe, made coffee, fed the cats, and refreshed their water fountain while Linda got dressed and washed blueberries to put in our granola. We took our coffee to the living room where I turned on the fireplace and we were joined by our feline friends. I put the finishing touches on yesterday’s post and e-mailed it to myself while Linda pulled up the latest video post from Dr. Michael Greger at NutritionFacts.org.
Linda left at 9:30 AM to meet Diane at Kensington Metropark for their weekly walk. As this will probably be their last walk together until spring they planned to go to lunch afterwards. While there was some work I could do by myself on the (permanent) installation of the desk there were other aspects of the job that would definitely require two people. I needed to finish updating the roster for the FMCA Freethinkers chapter so I spent about 30 minutes reading the manual for the new Sony SLT-a99v camera and then got dressed and worked in my office for the rest of morning.
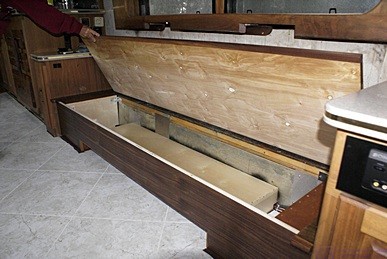
After a short lunch break I resumed working on the roster until Linda got home. She and Diane had lunch at Baker’s in Milford as it is close to the Metropark parking lot where they meet. We removed most of the things from the bus we were not currently using, many of which were stored in the sofa storage box. We got the sofa seat off of the desk pedestals and set it back in place on the sofa base.
I wanted to use pieces of a 24″ X 30″ furnace filter to cover the various air inlets in the desk bases and the air outlets in the OTR HVAC duct. The best way to hold the filter material in place appeared to be with some very strong tape. We did not have any such tape on hand so Linda went to Lowe’s and bought a roll of Gorilla Tape while I cut pieces of filter material to fit the various openings.
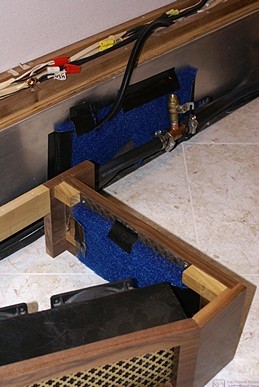
The left desk base and passenger side OTR HVAC duct showing the pieces of furnace filter material used to seal these openings while permitting filtered airflow.
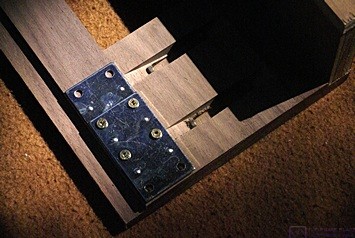
We got all of the openings taped up but I still needed to fabricate two tongue and groove alignment devices between the pedestals and the center connector/cover. I make these out of flat mending plates, one on the pedestal (tongue), and two on the connector/cover (groove). The tongue is flat against the back side of the pedestal vertical board and protrudes about 1/2″ beyond the edge. The groove is made from two plates, one stacked on top of the other, attached to the back side of the vertical connector/cover board. The upper plate is just back from the edge of the board and the lower one (next to the wood) is offset from the edge a little more than 1/2”, just enough to create a space for the tongue. The tongue and groove devices match two others lower down on the connector/cover. All four of them are oriented vertically allowing the connector/cover to drop into place and force it to align with the matching pieces of the pedestals. A pair of horizontal plates, one on each pedestal, provide a resting surface for the connector/cover that aligns it horizontally.
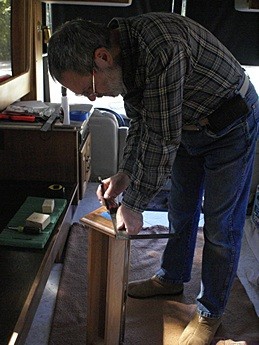
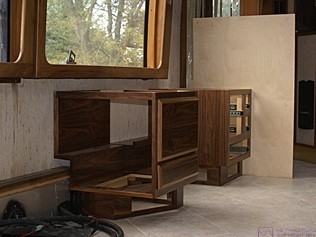
With the devices fabricated we were finally able to set the pedestals on the bases, drop the connector/cover in place, and align everything as if the entire desk was a single unit. We then got the Corian desktop out of my car, brought it into the coach, and set it in place. It will require some careful adjustments before we screw everything down but it basically fit properly and looked good. Final positioning of the left pedestal and base, however, would require us to put the front HVAC duct cover in position.
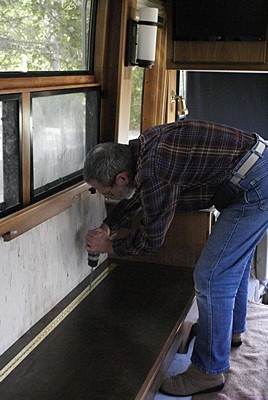
We got the cover out of the library and into the bus for the first time since we brought it home from Jarel Beatty Cabinetry in Logansport, Indiana. The length was perfect but the bump out where the heater hoses were originally going to loop through was too deep. I suspect the mistake was in my design/drawings. Jarel knew this piece was supposed to line up with the left pedestal and base but I no longer recall if he even had the desk pieces in his possession when he was building the cover. At this point it didn’t matter anyway. The misalignment is with the base and is not very visible. Also, the bump out is screwed on to the main cover so it can eventually be removed and trimmed or replaced with one that has the correct dimensions.
Once we had the cover in place I realized that I also needed to fabricate and install alignment plates between the cover and the left pedestal. I had not planned on this and did not have enough mending plates so we went to Lowe’s to buy more. While we were there I bought another can of 40:1 premixed fuel and a bottle of bar and chain oil for the new Poulan Pro 18” chainsaw. We stopped at Walmart to see if they stocked a particular folding chair made by Stakmore that we have seen online, but they did not. We think it would work nicely as a desk chair, and go well with the interior materials and colors in our bus, but we would like to see one in the round before buying it.
Back home I worked on the alignment plates while Linda prepared dinner. We had leftover lentil loaf, microwaved sweet potatoes, and a mix of steamed broccoli and Brussels sprouts. She added a little water to the lentil loaf before reheating it to moisten it a bit. We both like ketchup on our lentil loaf and I added some Pick-a-Poo sauce to mine. All three dishes were served hot, which was comforting on a cool evening, and everything was very tasty including the cup of hot tea.
I returned to the bus after dinner and finished installing the mending plates on the HVAC duct cover. I was not able to put it in place by myself, and there was no reason to have Linda come out and help at this hour, so I set the thermostats back and locked up the bus.
I called Butch and this time the call went through. I updated him on the installation and testing of the fan-coil heat exchangers and asked him about the operation of our new refrigerator. He suggested that I isolate the remote temperature sensors by using pieces of the furnace filter material to keep them from touching an objects or surfaces directly. He and Fonda are wrapping up at the RV Park in Bouse and moving to Quartzsite on Thursday. After we were done talking I worked on this post while we watched a few TV programs and then went to bed.