Tag Archives: auxiliary air system

2014/03/01 (S) Compressor Install Photos

A gallery of photos of the auxiliary air compressor replacement project.  Click thumbnail image to open.  Maximum dimension is 400 pixels.  Photos by Marian Hagan marked (MH).

2014/03/01 (S) Installing The Compressor

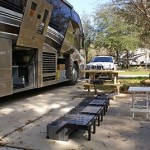
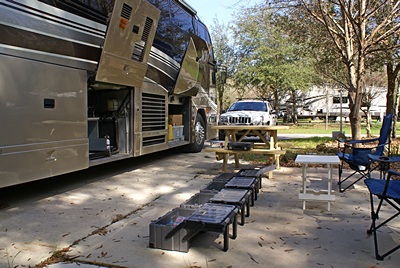
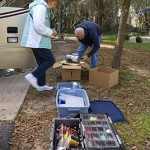
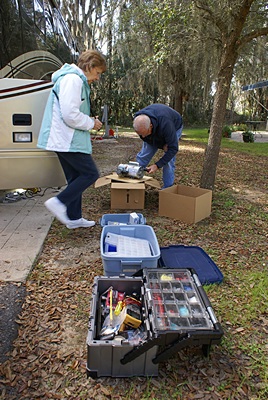
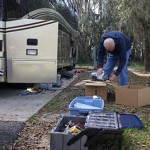
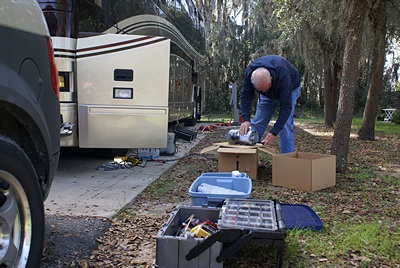
John and Marian arrived at 10 AM as I was getting ready to unload all of my tools and materials from their storage locations.  Marian brought her camera and took pictures of us working and I took photos of the details of the work as it progressed.  I have placed the photos in a separate gallery post with today’s date.

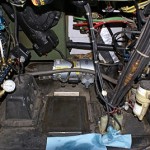
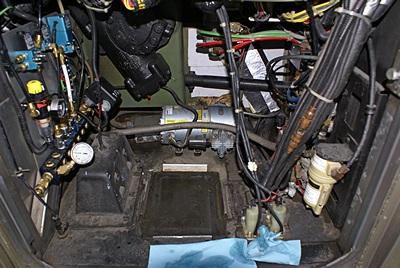
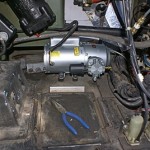
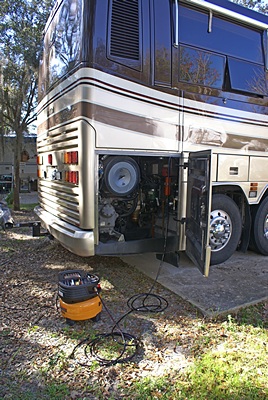
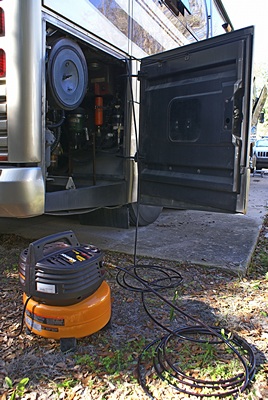
We looked at the old compressor and figured out what we had to do to remove it.  The auxiliary air compressor is mounted to the floor of the bay under the driver’s seat.  It is not a large bay, but it is big enough to allow access to the things that are installed there, especially after the plastic 5 gallon windshield washer fluid tank is removed.  (Yes, it holds 5 gallons of washer fluid; it’s a bus and everything on it is super-sized.)

I tried applying AC power to the compressor one last time with zero pressure in the auxiliary air system, but it was still seized.  I shut the circuit breaker off so we could work safely on the electrical aspects of the project.

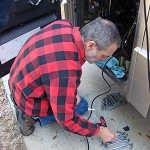
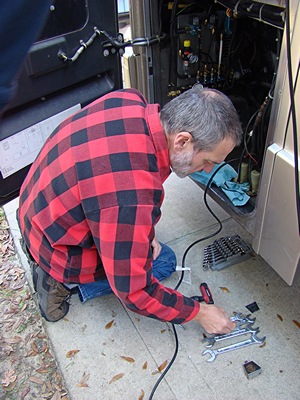
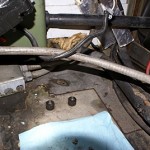
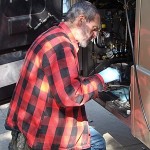
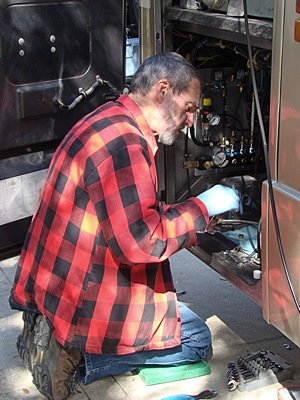
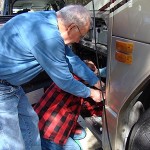
With the washer fluid tank out of the way we could see that the compressor was mounted on four rubber isolation mounts.  These mounts were ~1″ thick with bolts protruding from either end.  One end was bolted to the air compressor mounting flange.  The other end went through a hole in the floor and was secured with a Nylok nut from under the bus.  The compressor was installed with the length oriented front-to-rear (buswise) so we could get to the interior nuts on the side of the compressor facing us, but not the ones on the other side.  We could hardly see those nuts even with the inspection mirror.  Fortunately the bottom bolts were close enough to both the driver side and front of the bus that I could reach them without having to get under the bus.  With the auxiliary air system bled completely down the suspension was holding, so we did not put the bus up on stands for this work.  I do not get under the bus under those conditions.

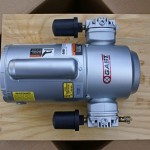
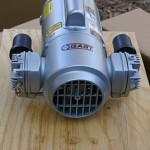
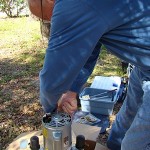
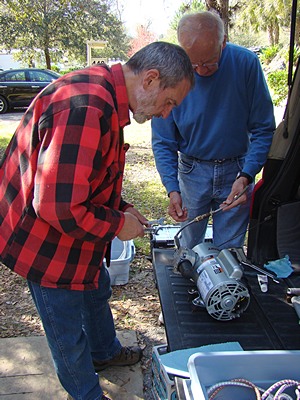
We disconnected the air line from the compressor while it was still mounted and then disconnected the other end from the T-fitting and removed it from the bay.  We then unbolted the air compressor and turned it 90 degrees so we could get to the electrical connections on the end of the motor.  With the electrical connections undone we were able to lift the old unit out.  It weighed about 30 pounds.

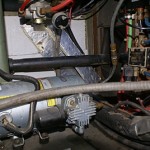
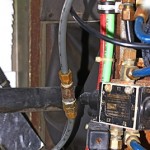
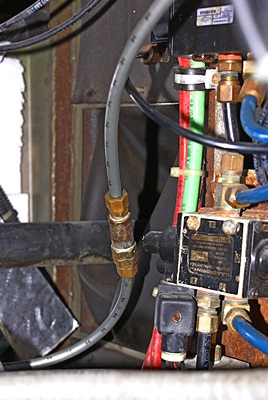
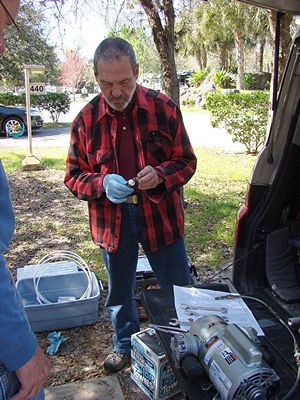
Butch had alerted me to the possibility that the check valve I bought from Prevost might not be exactly what I need.  He said that air compressors usual have an unloader valve or mechanism in the air line ahead of the check valve.  The purpose of the unloader mechanism is to bleed the pressure off of the air pump when it stops running so the next tine it starts it is initially working against zero pressure.  We examined the old check valve and sure enough, it had an “extra” piece with a small port in the side.  We tested it and verified that the check valve was, in fact, leaking but the pressure relief valve was working.  We also discovered that all of the fittings were compression rather than pipe thread like my new check valve.

After studying the situation for a while John and I agreed that the best course of action was to reuse the old check valve and unloader and put the new check valve in the air line downstream from them.  The new check valve would prevent backflow to the new auxiliary air compressor, and protect it from the higher pressures generated by huge main engine air compressor, while the unloader would relieve the pressure on the auxiliary air pump when it stopped running.

This was the point at which we realized that I did not have all of the necessary fittings to reassemble the air line with the new components.  John got on his phone and found that there was a NAPA auto store not far from the RV Resort.  It’s always something.  This is why jobs that should only take “a few hours” end up taking all day (or longer).  Two trips later and we had everything we needed.

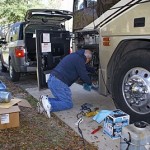
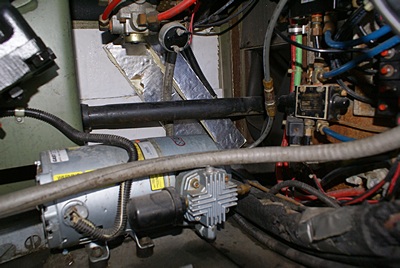
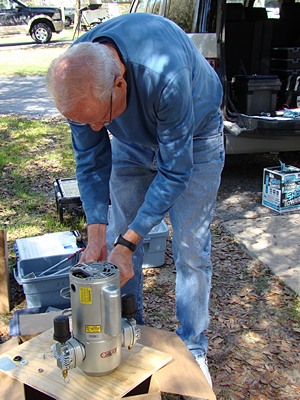
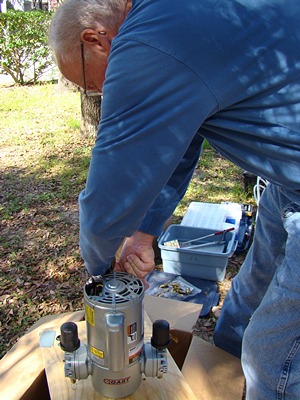
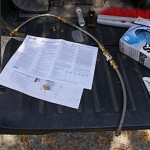
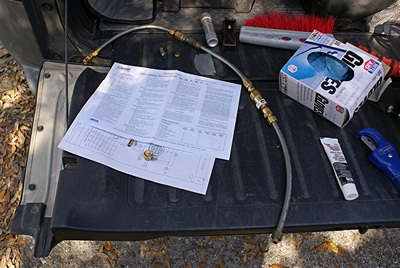
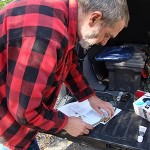
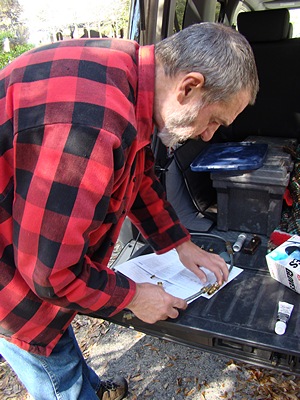
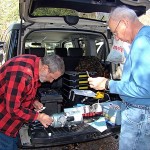
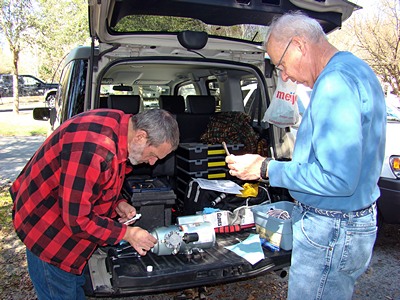
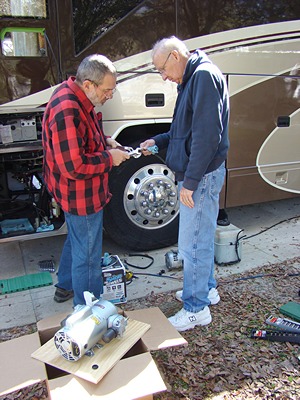
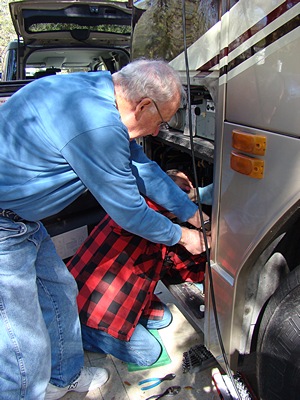
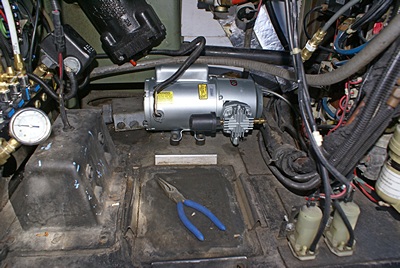
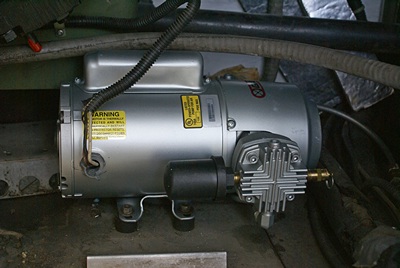
We assembled the air line in two pieces using old and new fittings.  We used PTFE pipe thread compound on all of the threads.  As I do not travel with a vise it was very helpful having four hands to hold things and another pair (Marian) to help as needed.  (Our mechanic would like me to mount a vise to trailer hitch so I can slide it into the receiver on the back of the bus or the car.  That would have been handy for this project.)  We attached one piece of the air line to the compressor and the other piece to the T-fitting.  John had previously attached the two isolation mounts that came out with the old compressor.  We set the new compressor in the compartment with the motor pointing out and reconnected the AC electrical power.  We then turned the compressor 90 degrees and dropped the rear mounting bolts through the two holes in the floor.  John had put the mounts in just the right place and it was a perfect fit!  We put all the nuts on and snugged them up.  The final step was to join the two pieces of the air line together and test it.

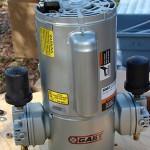
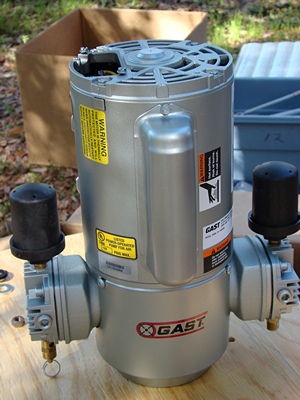
I turned on the AC power and it purred like a kitten.  Well, maybe like a really big, loud cat.  We watched the pressure gauge in the auxiliary air manifold and although we could hear air being pumped the pressure was not coming up.  I quickly realized that the primary and secondary tanks had bled down to about 40 PSI and the auxiliary air compressor had to fill them to 70 PSI before the auxiliary air tank/system would fill.  The auxiliary air compressor is not intended to fill the entire chassis system, although it does maintain the pressure at its cut-out setting, so I shut it off.

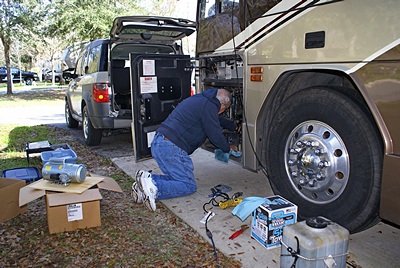
I had asked John to bring his portable air compressor and he did.  We connected it to the fill connector/valve back by the main engine and used it to fill the primary, secondary, and auxiliary air systems to about 110 PSI.  I then turned the power back on for the auxiliary air compressor and opened the drain valve on the auxiliary air tank.  At 80 PSI the auxiliary air compressor came on.  I shut the drain valve and the pressure came back up to about 104 PSI.  The system was back in operation! I started the stopwatch on my smartphone to time how long it would take to leak down to the cut-in pressure while I cleaned up and put away tools.

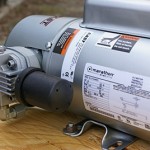
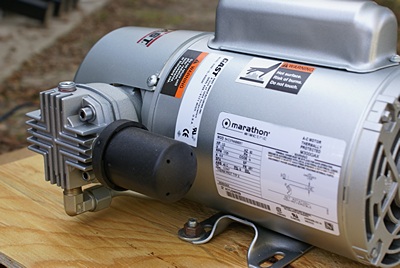
The only issue at this point was that the auxiliary air compressor was rated for 100 PSI maximum pressure so the pressure control switch needed to be adjusted.  I turned the power off, removed the cover from the pressure switch, and discovered that it had three spring-loaded adjustments rather than the two I expected to see.  I put the cover back on, restored the power, and suggested that the three of us go out to dinner at Angelina Mia.

At the restaurant I made a special request for pasta in olive oil.  The owner was there and she came to the table to clarify what I wanted.  She said she could do spaghetti with olive oil, garlic, some hot pepper flakes, and spinach.  Winner!  I also found out that Angelina and Mia are her daughter’s names.  We did not get around to working on dashboard wiring issues today, so John and Marian agreed to come back tomorrow.

After dinner I got online to research how to adjust the pressure switch, but everything I found was for a unit with two adjustments, not three.  The key, however, was that the diagram for the unit was probably inside the cover.  I had not thought to look there earlier.  That would be the first task for tomorrow, and then on to wiring issues.


2014/02/03-04 (M&T) Happy Birthday

After our fairly active weekend we wanted to be home bodies for a couple of days.  It’s not that we couldn’t go all day every day; it’s that we don’t have to and choose not to.  We are not on vacation and we do not have to fill every waking minute with new and exciting adventures to the point of mental and physical exhaustion.  Linda needs quiet days to work on her cross-stitch project and I need quiet days to process photos and write.  Besides, Tuesday was my birthday and Linda wanted to bake a cake.  Oh, and we had to tend to bus issues.

Our male tabby cat Jasper, in his Sphinx position.

Our male tabby cat Jasper, in his Sphinx position.

A bus issue that had been developing for a while involved our auxiliary air compressor.  It was sounding worse by the day when it ran, vibrating excessively and making loud, unpleasant sounds.  I checked the mounting of the air compressor and the vibration dampening rubber mounts appeared to still be OK.  I noticed that the sight gauge on the side of the air accessories filter housing was showing water at the 80% full level so I decided to try draining the auxiliary air tank.


A hard copper line runs from the auxiliary air tank to a drain valve on the front outside corner of the floor in the bay under the driver’s seat.  I had to open it carefully using a pliers, but once it was open it let out what I estimated to be at least a quart of water, including a considerable quantity of milky white liquid similar in appearance to skim milk.

There is a petcock style drain on the bottom of the auxiliary air filter housing so I also opened that.  I got some water out, but not much, and the water level in the sight gauge did not drop.  I needed to start the main engine to roll the bus forward so a different section of the tires was in contact with the pad to avoid flat spots from being parked for three months.  I let the engine fast idle for over 10 minutes and used the higher pressure, very dry air from the main engine air compressor to purge the auxiliary air tank, air lines, and other air accessories.  When I was finally getting nothing but dry air from the drain I closed both drains tight and shut the engine off.

I was checking the bay and heard a distinct hiss indicating an air leak.  I sprayed soapy water on various fittings and finally got bubbles on the air compressor side of the check valve in the main air line from the auxiliary air compressor to the auxiliary air filter.  With the auxiliary air compressor not running this indicated that the check valve itself was leaking, not just the fitting.

I texted and then talked to our mobile mechanic, Joe Cannarozzi, about all of this.  Although he is staying at an RV park an hour from here He was tied up with a major bus project and unable to come work on this for us.  He was confident, however, that I could replace the check valve myself and that Prevost Jacksonville had them in stock.  (He had just spent four days there with the bus he is working on.)  He wanted to know when I had last drained the auxiliary tank.  I couldn’t recall the last time, but it was probably several years ago.   He suggested that I drain it daily.

Since I would have to depressurize the entire air system to replace the check valve I figured I would replace the filter element in the auxiliary air filter at the same time.  I looked up the part in the Prevost CatBase system and found the part numbers for the filter element and the O-ring/gasket kit.  I called Prevost Parts in Elgin, Illinois to order them.  As sometimes happens on an older bus our filter housing, and the service parts for it, were no longer available and had been superseded by a different assembly.  The check valve, however, was available and in stock at the Jacksonville service center.  I wanted to see the part before I purchased it to make sure it was what I needed, so I decided not to order it and instead drive to Jacksonville on Wednesday to get it.  That would be a two hour trip one way, so started looking at what else we could do over there.

Sunset light on thunderstorm cloud to the east.  Our car and coach visible lower right.

Sunset light on thunderstorm cloud to the east. Our car and coach visible lower right.

Linda found a recipe for a vegan vanilla cake and made it for my birthday.  We went for a walk while it cooled.  Thunderstorms were building in the area as the sun set and we got some nice light on the clouds.  It turned out quiet well.  She made a sauce from fresh red raspberries to put on top and it was also very good.  Life is good.


2013/12/21 (S) Winter Solstice

Often referred to as “the shortest day of the year” the winter solstice is the exact same length as every other day of the year.  What’s special about it is that in the northern hemisphere it is the day with the least time from sunrise to sunset and the most time from sunset to sunrise.  From here to the Summer Solstice the minutes of daylight increase slightly each day.

As glad as we are to be headed south, there are always reasons to stay home.  Family tops the list, especially birthdays and holidays, but we took care of that with the cooperation of our families.  We have our friends and clubs, of course, but another reason would be the Winter Solstice Special Release Party at Schramm’s Mead in Ferndale.  Since we could not be in two places at once, we will just have to hope that Ken still has some Winter Solstice left when we get back.  🙂  If not, perhaps Ken will have a Vernal Equinox Special Release or a Summer Solstice Special Release.  Any excuse to buy Ken’s mead.

What we did instead was pull out of the Oh! Kentucky RV Park/Campground at 8:20 AM and drove 0.3 miles to get back on southbound I-75.  It was dry but overcast as we started out, but we were in and out of rain for most of the drive.  The rain was generally light, but we did encounter heavier rates from time-to-time.  We did not experience much fog, but we did have some areas with ground clouds.  We made it past Knoxville, Tennessee without the problems we had back in October.  This was the farthest south we have been with the coach, and the first time I have driven I-75 south of Knoxville.  We made a brief stop for fuel at the Pilot Travel Center in McDonald, Tennessee and continued south on I-75 into Georgia.  This the first time I have driven anything in Georgia and the first time we have had the coach there.  Even with the rain it was a relatively easy and uneventful drive, except for the continued, almost random, on/off of the Check Engine Light.  The coach ran well with good power and all of the gauges indicated normal operation, so we just pressed on.  When we get settled in Arcadia for the rally I will pull out the ProLink and read the codes.  That should draw a crowd and might even make for an interesting round-table discussion.

At 1:30 PM we took exit 111 and headed west 0.3 miles to the entrance of the Cartersville/Cassville-White KOA, This was our first time staying overnight in the Georgia in the motorhome.  Linda had called ahead when we were near Knoxville, Tennessee, so we knew the office would be closed from 11 AM to 3 PM.  The office manager left a map of the campground for us in the night registration station with our spot marked on it and the route to take through the campground to get there.  She even put an orange traffic cone at the entrance to our site to mark it as reserved; very thoughtful.  The temperature was in the low 60s when we arrived and rose to 69 during the evening.  Rain was forecast for the later evening and thunderstorms for the overnight.  As we have done since before we left, we kept an eye on the weather.

This is the second KOA we have stayed at in the last three months.  We tend to think of them as overpriced with lots of amenities that appeal to families with kids, but that we don’t use.  Both parks, however, have been very good places for us to stay, with:  convenient access; good gravel interior roads with sufficient width and turning radius for our rig; mature trees trimmed up high enough to not scratch our motorhome; pull through sites with 50 amp full hookups; and clean bathrooms with good showers.  The one in Natural Bridge, Virginia was full of kids, but it was a weekend near Halloween and we had fun giving away candy to the trick-or-treaters.  The current location appears to be no more than 40% of capacity, with no evidence of kids; definitely off-peak season.

As an update to yesterday’s post, I discovered that I was pushing the wrong button and that both windshield washer pumps do, in fact, work.  Duh.  L  The good news was that both windshield washer pumps work!  J  When we got to our destination I switched the output hoses back to their correct pumps so everything should work the way it’s supposed to tomorrow; except perhaps for those clogged orifices on the lower wiper arms.  It’s always something, it seems, and any RVer who is honest about it will admit that.  But they will also tell you that it’s part of the experience/lifestyle, and you either learn to take it stride and deal with it or you end up doing something else.

As a final technical note, now that I have started valving off additional circuits on the auxiliary air system, the pressure seems to be holding much longer and thus the compressor runs much less often.  It is now at least a two hour cycle and may be holding longer than that.  The new auxiliary air distribution/control panel that I built last year and installed this past spring has made it possible to do this.