Tag Archives: panoramic camera technique

2014/02/09 (N) Crystal River State Parks (FL)

Our destination today was the two state parks near Crystal River, Florida; Crystal River Archeological SP and Crystal River Preserve SP.  We left around 10:45 AM and headed down US-41 to Dunnellon, Florida where picked up John & Marian Hagan from their house.  John navigated us over to the town of Crystal River.  From the heart of downtown a short drive north on US-19 brought us the iconic brown state park sign telling us to take the next left turn to get to the parks.

Crystal River Archeological SP preserves an important pre-Columbian site with burial and midden mounds as well as mounds that once supported temples.  Evidence of occupation goes back before the Common Era and there is a small, but nice, museum explaining the modern history of the site and the archeological activities that led to our present day understanding of the people who built and used the site send its mounds.  The trail system is paved and less than one mile in total length.  It was a quiet place for peaceful if thought-provoking stroll on a beautiful late winter afternoon.

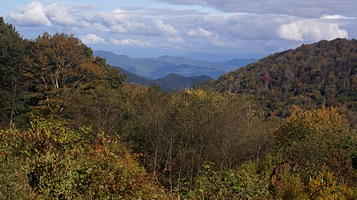
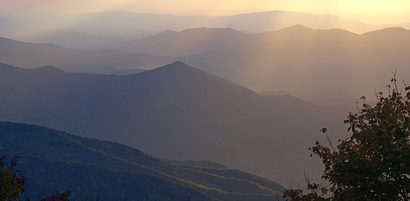
Crystal River Preserve SP is listed on some maps as Crystal River Buffer Preserve SP, and that is an apt name for it.  About equal in size to the archeological state park, it surrounds it and buffers it from encroachment and most recreational uses.  The archeological park has a picnic area, but no place to launch boats, canoes, or kayaks, or to flush.  The buffer preserve, by comparison, has a much longer trail system with lots of access to water.  We hiked approximately 2 miles in pleasant temperatures on a trail through the woods along the water’s edge and saw a number of people fishing.  The light was good and the wind was light which made for nice reflections.  The following photograph is a panoramic composite of three images made using the Microsoft Image Composite Editor (ICE) and post-processed using Faststone Image Viewer.  MS-ICE is an amazing little free program.  The three camera images were hand held with auto-focus and auto-exposure.  The rules for compositing photos to make panoramas are: 1) tripod, 2) special pan head, 3) fixed/manual focus, and 4) fixed exposure.  This image violated all of these rules and still came out well.

Crystal River Buffer Preserve SP (FL).

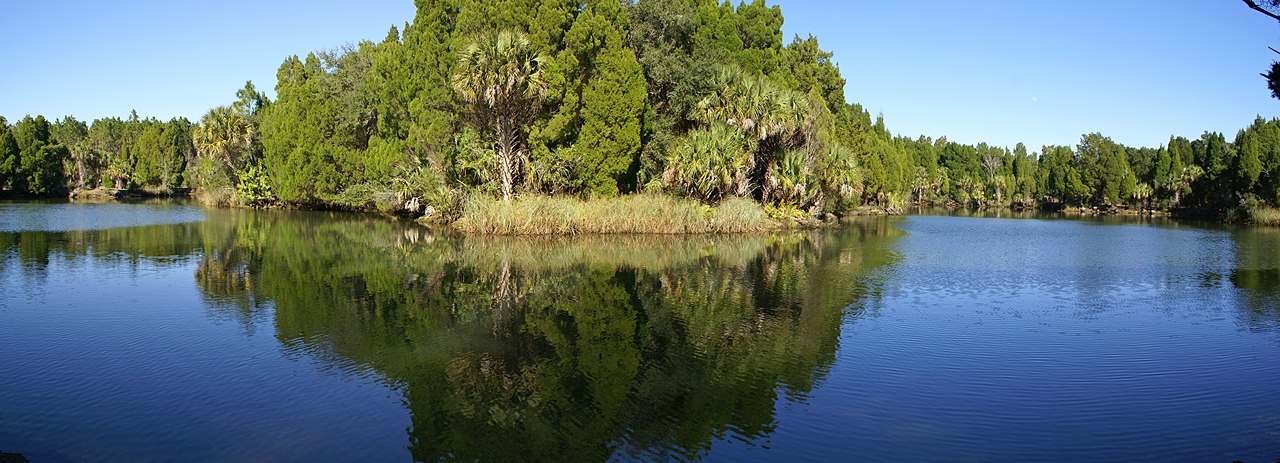
Crystal River Buffer Preserve SP (FL).  [Click to enlarge to 1280 pixels wide.]

By 3:00 PM we were all getting hungry so we looked for vegetarian friendly options in Crystal River.  The only place that came up was the Brooklyn Dockside Deli but the website indicated they were only open for breakfast and lunch.  We stopped there anyway and they were open until 4:00 PM, so we had a late lunch /early dinner.  John had a Cuban sandwich, Marian had a Reuben sandwich, Linda had a spinach wrap veggie sandwich, and I had a veggie sub.  Everyone enjoyed their food and the un-assuming setting by the water.

We drove John and Marian back to their house and returned to Williston.  We arrived back at our coach before it got dark; something we have rarely accomplished on our recent outings.  Our neighbor, John, invited us to join them later for a small campfire at another neighbor’s rig a few doors down.  Since we were not having dinner as such I off-loaded today’s photographs from the camera, created the panorama, and worked on this blog post.  We checked a couple of times but never saw a campfire where the campfire was supposed to be, so we figured the plans had changed due to the cool temperatures.  Sunday evenings is Masterpiece Theater on PBS, so we settled in for the evening.


2013_10_15 (T) Image Post-Processing

(At the end of this blog are the same 10 images I posted yesterday, only this time with image post-processing.  There is also a new image that I created today.)

The photography workshop today was mostly classroom work.  We spent the morning seeing several image post-processing programs demonstrated and discussing their functions.  The featured programs were Faststone Image Viewer and Photoscape, both of which are free downloads.  Each of the five workshop participants contributed a few pictures from yesterday and Lou, the workshop presenter, used them as examples to demonstrate the use of the image editors.  Most of us were new to this sort of image manipulation, so the focus was on understanding the image histogram, adjusting levels, adjusting “lighting” (highlights, shadows, contrast, and saturation), sharpening, cropping, and resizing.

After lunch Sue Wharton, one of the participants, demonstrated and discussed Adobe Photoshop Elements, which can be purchased for a moderate price.  Sue has used versions of Elements, all the way back to the very first one, to organize her photographs.  She emphasized that Elements will do everything we saw demonstrated in Faststone Image Viewer and Photoscape, but demonstrated some additional features that the free programs did not have.

We also discussed Adobe Photoshop and Adobe Lightroom.  Photoshop is generally considered the ultimate photographic image editing tool, but it is a considerably more expensive program with a steep learning curve.  We were told that Lightroom, which is also not free, was the number one choice of professional photographers for managing their collections of digital images.  As of this writing I am not completely clear on the just what each of these programs does or how they (should) fit together, but the general consensus was that Lightroom is the ultimate “front end” image organizer, below which you need an image editing program or programs, which is most of what we saw demonstrated today.  Adobe Elements, however, is a very acceptable all-in-one solution to both the organizing and editing tasks.  Another program we discussed, but did have demonstrated, was Topaz Photoshop Plug-ins, along with iView (and irfinview), which are needed for the standalone use of Topaz plug-ins if you don’t have Photoshop or Photoshop Elements.

The last thing we discussed was how to create panoramic photographs using a two part process.  Part 1 was setting up the camera properly on a tripod and adjusting it so you could take a sequence of overlapping photographs as you pan across the scene.  Part 2 was using special programs or plug-ins to create a single composite image from the multiple photographs.  Lou demonstrated the use of a special panoramic camera mount that allowed the “nodal point” of the lens to be positioned at the exact center of rotation.  While this is slightly less critical than back in the film camera days, setting the camera up properly for panoramic shots still leads to better compositing in part 2.  One of Lou’s favorite tools for creating composite images is Microsoft Image Composite Editor (ICE) available as a free download from Microsoft.  He demonstrated how it works using some properly taken photographs he already had on hand.

After a mid-afternoon break, we headed to the Visitor Center in Townsend.  Everyone came, including a couple of spouses who are not participating in the actual workshop, so we first spent a little time in the Visitor Center gift shop.  The back parking lot had an unobstructed view of low hills with some middle and foreground elements that provided the opportunity to shoot up to a 180 degree panorama.  It was not a spectacular landscape, and the sky was cloudy to overcast, but it was an excellent spot for learning how to do this technique.  It had the further advantage of being close to both the Tremont Outdoor Resort, where we are all staying, and the restaurant where we planned to have dinner.

We all set up our tripods, leveled them (and our cameras), and went to work.  I first did a test shot in the center of the scene to determine the correct exposure.  Once I had that, I set the camera to Manual and locked that exposure in.  (That may not sound like a big deal, but I had only figured out how to do this within the last 24 hours, even though we have had the Sony Alpha 100 for years.)  I also set the camera to manual focus and adjusted it the way I wanted.  It is critical that both of these functions be set to manual; if the exposure or focus changes from shot to shot, the compositing software may not be able to stitch the images together, either satisfactorily or perhaps at all.  With the anti-shake feature off, and using a remote (cable) release, I shot a full 180 degree panorama with a moderate telephoto lens, taking 16 photographs to do it.

We went to dinner at a local Bar-B-Que restaurant on the river.  Linda had checked the menu in advance and packaged a blend of toppings that we could put on a salad consisting of lettuce and tomatoes.  Our salads ended up having beans, broccoli, onions, dried fruit, and peanuts (and probably a couple of other things).  Being as it was dinner out, I got small orders of French fries and onion rings.  The food was OK for the price.

After dinner Vince and I headed back to the classroom where Lou helped us stitch together our composite panoramas.  I finally got back to our coach around 8 PM.  Linda and I then worked on post-processing the images from yesterday’s blog post using what we had learned today.  And here they…I hope you enjoy them.


20131014x00116(2)

2013104x00121(2)

20131014x00135(2)

20131014x00144(2)

20131014x00153(2)

20131014x00155(2)

20131014x00165(2)

20131014x00175(2)


20131014x00179(2)

Townsend TN Visitor Center - 180 deg panoramic composite of 16 photographs.

Townsend TN Visitor Center – 180 deg panoramic composite of 16 photographs.