Tag Archives: refrigerator temperature monitoring (H3-40)

2015/11/20 (F) The End of Projects (for now)

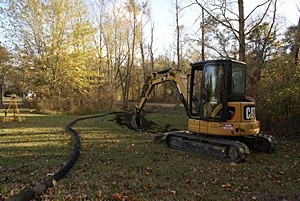
Linda was up at 5:45 AM again and off to the bakery at 6:15 but this was the last time until spring 2016.  There is still more to do on both the software project and year-end accounting but she will do it remotely.  We need the weekend and the first three days of next week to get the motorcoach, the house, and us ready to travel and prepare for our Thanksgiving Day family gathering.  Also, unlike the last two winters, Linda does not plan to fly home in late February to take care of year-end accounting and tax work.  She will handle all of that from Florida instead, so she has to make sure she has everything she needs with her in the bus when we leave.

This was likewise the last day for me to work on bus projects.  The things I needed to do in the bus included:

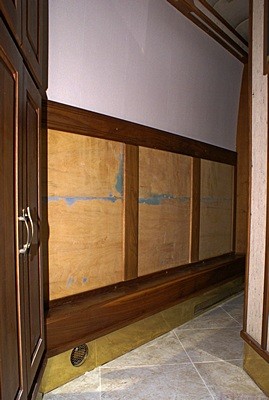
  • Install metal edging to protect exposed tile edges.
  • Grease the steering column.
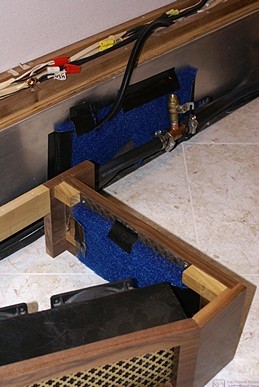
  • Install filter material over the HVAC holes under the bed.
  • Mount the West Mountain Radio RigRunner on the dashboard.
  • Pull the chassis battery tray out and check/clean/tighten the connections.

But I had a few other things to attend to first.

I was up and dressed at 7:45 and had an alarm set on my iPad for 8 AM to remind me to pick up our coffee bean order from Teeko’s.  I had a bowl of granola for breakfast and then called Brighton Honda.  My last oil change was at 99,280 miles and I now have over 105,000 on the odometer so I made an appointment for Monday afternoon to have the oil changed.  I had a cup of tea in the living room where I spent some time with our cats.  I then went to my office and replied to an e-mail from Gary at BCM.  I called Teeko’s to make sure our coffee was ready to pick up.  Mary did not have it packaged yet but said she would have it ready in an hour.  I indicated that it would be longer than that before I got there.  I called Discount Tire in Howell to see about having the tires on the Element rotated.  They were running 2 – 3 hours so I made an appointment for Monday morning.  I called Brighton Ford/NAPA to order an air filter for the bus.

I moved the brass colored stair edging into the bus and checked the temperature.  It was 64 degrees F so I bumped the thermostats up just a bit.  I also switched the remote temperature sensors so that #1 was in the freezer (top) and #2 was in the fresh food compartment (bottom).  I removed the ham radio antenna from its magnetic mount and put it in the car.  I finally left at 11:45 AM on my errand run.

My first stop was Wendy’s where I had an order of French fries for lunch.  I then went to Lowe’s, which was just across the street, for carpet stain remover and looked at tarps while I was there but did not buy one.  I don’t think we will be able to create enough space in the garage for the lawn tractor so I want to cover it for the winter.  From there it was less than a mile east on Grand River Avenue to the car wash.  I had taken the ham radio antenna off before I left the house but the car wash knocked the magnetic mount cellular booster antenna loose.  I pulled into a parking spot, put the cellular antenna back in position, and reattached the ham radio antenna.

I backtracked that same mile and stopped at Teeko’s to pick up our coffee order.  It seemed light but Mary already had it bagged and I was anxious to move along so I did not check it.  I continued west on GRA to the Bank of America branch near The Home Depot (which I should have done after stopping at Wendy’s).  With colder temperatures coming the next few days I decided to drive to the Shell station in Brighton and top off the tank.  The sign said regular was $2.059/gallon but the pump I used was set to $1.959.  Deal.

When I got home I checked the coffee order and realized something was not right.  There were supposed to be 16 vacuum sealed 1/2 lb. bags, four each for four different coffees, for a total of eight pounds of beans, but there were only 10 bags.  Some of them were definitely much less than a half pound but I did not have a scale and so I had no way to know for sure what the total weight was.  Three bags were also unsealed and some of the beans had spilled into the larger bag.  Two of those bags were the same bean but unfortunately the third one was different so I had no way of knowing which bag, or bags, the loose beans came out of.  I dumped the loose beans into the bag that was the most open as that was the easiest one to get them in.  I closed the three unsealed bags with spring clips, put everything back in the carry bag, and drove back to the coffee shop.

I was not pleased with the situation, especially the fact that I had to make this extra trip, but I worked through my frustration while driving and was friendly and courteous while I was there.  Being upset and nasty to people never accomplishes anything good.  Roger was there in addition to Mary and once I explained what we had ordered on Monday evening from Jeff it was obvious that something got lost in translation.  They will make it right and we will pick it up late in the afternoon on Monday.

For some time now we have felt that we do not always have Jeff’s full attention when he is waiting on us.  Teeko’s has had its challenges over the last couple of years, first with road construction making access to the strip mall more difficult, and now with the opening of a Panera on the opposite corner of the intersection.  My sense is that they have struggled financially as evidenced by the fact that they never spent the money for a proper neon sign.  As a result the shop is not as visible as it should be even though it is located at a major intersection.  Jeff got married last year and they just had their first child in September.  With those added responsibilities he went back to work driving a delivery truck for PepsiCo, which has a major plant on the south central side of Howell.  His parents, Roger and Mary, have been left to run the coffee shop during the day, which I suspect is not what they intended to be doing in their retirement.  Still, they are always very pleasant to deal with and I feel for their situation.

As much as we like Panera, when we still lived in Farmington Hills we tried to patronize a series of small, independent coffee shops but they all failed in the end.  Some failed because of mis-management, but ultimately they could not compete with the Starbucks, Panera, and Einstein Brothers stores in the area.  Sadly, I suspect this will also be the fate of Teeko’s even though it is a nicer coffee shop than the Biggby’s just down the street.  And it’s too bad (for us at least) as we really enjoy being able to purchase a variety of green beans and have them roasted to order.

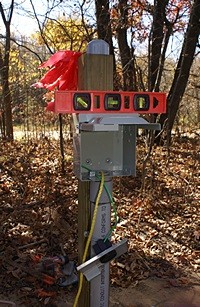
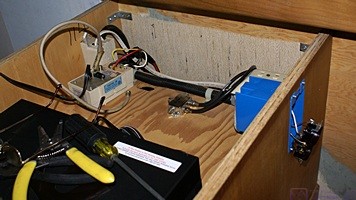
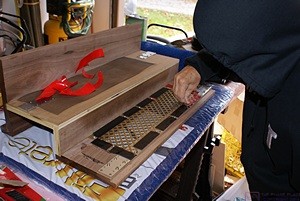
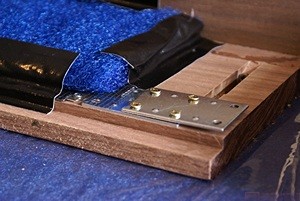
Back home I finally got to work on the bus around 3 PM.  I got all of the old silver colored metal stair edging from the garage and determined where each piece had been installed.  I realized that I did not have a good way to cut the new edging nor did I have the time to measure, cut, and install it before it got dark.  I really wanted/needed the exposed edges of the tile protected so I decided to reinstall the old edging.  Although it had obviously seen heavy use over the years it was still serviceable.  Of equal importance was that it was already cut to approximately the correct length and angles.  I checked that the holes on the new edging would fall in different places than holes in the old edging.  That was the case, so I held each piece in place and drilled a small pilot hole at every third hole.  I changed to a different bit to drill through the metal that secures the edge of the plywood bus floor and then screwed each strip of metal edging in place.  The new edging will cover the holes from mounting the old edging.

This was the only work I was going to get done on/in/around the coach today.  Linda had called by this point to let me know she was heading home and was going to stop at Meijer’s along the way.  As soon as she got home she started making three batches of granola.  She is going to make and freeze as many batches as she can fit in the freezer so we can enjoy this fabulous granola well into winter.

While Linda made granola I worked at my computer cleaning up old e-mail.  Dinner was vegan Pad Thai; not like the real thing, of course, but it was easy, hot, and tasty enough.  We had some small oranges for dessert.  I worked at my desk for a while after dinner deleting old e-mails.  I quit at 8 PM to watch a few TV shows and work on this post.


2015/10/23 (F) Fetching Antique

Linda was back on schedule this morning; up at 5:45 AM and off to the bakery at 6:15.  I got up around 7:30 AM, ground beans for a small pot of coffee and made breakfast.  Breakfast was oatmeal that I made myself from quick cook oats with raisins, dried cranberries, and pecans.  I forgot to add cinnamon and brown sugar but I did add a small amount of vegan butter, sugar, and non-dairy coffee creamer.  I like to cook my oatmeal until it is very thick and then loosen it up slightly with these additions.

After breakfast I checked the thermometers in the bus refrigerator and recorded the temperatures.  They seem to be all over the place and I am really starting to question the accuracy, and thus the usefulness, of these relatively inexpensive “consumer” devices.

Around 10 AM I was getting ready to drive to Canton when I got a call from Chuck.  The pair of motorized MCD duo shades had arrived the other day and he was having difficulty installing them.  I offered to stop by his shop after my errand and he said he would be there.

I called Clyde to make sure he would be home and then headed to Canton to pick up the antique Sun automotive distributor tester.  Clyde’s house was easy to find; an old residential area tucked away behind what is now a heavily developed commercial strip along Ford Road either side of I-275.  He helped me load the tester into my car and then we chatted for a while.  He had a very rare and beautifully restored (customized) 1948 two-door Pontiac boat tail sport coup; all black with two chrome strips, one down each side.  I am not a “car guy” but I appreciate a work of art when I see one.

I drove to Chuck’s shop in Novi to see how the windshield shade installation was progressing.  The pocket between the upper windshields and the cabinets was too narrow on the outside ends to allow the shades to tilt enough to engage the clip in that end and then swing up and latch on the other side.  After struggling with it for a while we went to lunch at the Panera nearby.

Back at his shop we pondered the installation problem until I finally had an insight.  The upper windshields slope away from the overhead cabinets, creating more horizontal space at lower heights.  I suggested that using a 2″x2″ board as a spacer might lower the mounting bracket just enough to allow it to tilt into place and have enough space to lock it in and release it if needed.  Chuck had a scrap piece of 2×2 that we used to see if my idea might work.  Chuck thought it would work so he locked up the shop and I headed for home while headed to The Home Depot.

Back home I checked the thermometers in the bus fridge.  The readings just did not make sense so I brought the LaCrosse base unit and remote into the house to get them away from the TempMinder components.  I researched methods and equipment for measuring temperature in freezers and refrigerators looking for something that would be more accurate and precise than our current technology but I did not find much.

The more accurate temperature measurement instruments that are available for under $100 all use wired probes rather than wireless remote sensors.  The best ones have the probes sealed in small glass bottles filled with a liquid such as alcohol, oil, or glycerin.  These remain liquid at normal freezer and refrigerator temperatures and surround the temperature probe with enough thermal mass to prevent it from responding too quickly to changes in air temperature such as occurs when the door is opened or the fridge compressor and fans are running.  In effect the probes more accurately reflect the temperature of things stored in the refrigerator rather than the instantaneous temperature of the air near the sensor.  The wires for the probes are typically relatively fine and do not prevent the door seals from closing completely, at least in the short term.  A permanent installation, however, seems ill-advised.

I was researching flash units and other accessories for our new Sony alpha 99 camera when Phil showed up mid-afternoon.  I set my research aside and went out to chat with him and watch what he was doing.  He had a full truck load of sand from another job that he dumped at the west end of the property and then moved it into some of the low spots, of which there are many.  He used his front loader to finish removing topsoil from the new driveway area by the third culvert and load it into his truck.  He filled the truck and dumped it at the west end of the property.  He then used his bulldozer to grade out the area of the driveway where he had just removed all of the topsoil.  Finally, he used the front loader to compact the sand driveway base.

Phil was going to come back on Saturday but he is at the point where he needs stone (21AA road gravel) that he will not be able to get it until Monday.  He is also finishing up other jobs that involve inspections and won’t be back here until at least Tuesday.  I need to trim the lower branches on some of the trees to get them out of his way, and out of Keith’s way when he mows the grass, so I will probably do that on Monday, leaving Saturday and Sunday to work on the bus while Linda is available to help.

Phil was still working when Linda got home so I left Phil to finish up and went inside.  I was tired and took a short nap while Linda fixed dinner.  She made a nice salad and risotto with celery and dandelion greens; a first for us, and very tasty.  We also did a taste test of the California Olive Ranch EVOO versus the Philippe Berio EVOO that Linda normally uses.  We used Italian bread that she brought home from the bakery.  I was able to detect a very subtle difference in the taste but had to not use the crust of the bread as the poppy seeds provided their own distinct taste.  The COR product was the top choice of a tasting panel at Cook’s Illustrated magazine and reasonably priced at just under $10 a bottle but I did not find the taste superior to the PB product.

After dinner I went to my office and checked e-mail.  I took care of some things related to the November 2015 issue of BCM.  We had confirmation e-mails from Molly Pinner for our 56th Escapade Volunteer assignments.  I also had one from Kate with links to camera harnesses at B&H Photo and a second with links to a recent interview on AM1700 with the organizer of the Pop-X art exhibit in Liberty Plaza and photos she has taken of guests at the station and musical groups at SxSW and other venues.

I talked briefly with Mike (W8XH) via the South Lyon 2m repeater using the Yaesu FTM-400 radio.  Our ham shack was working just fine so apparently there was no Info Net this past Sunday.  I called Butch to let him know I had the distributor tester and chatted with him about the refrigerator temperature monitoring problems I am having.  It was then off to bed, as we have to be up by 7 AM to get to our weekly ham radio breakfast in South Lyon.


2015/10/22 (R) Another Routine Exam

Linda got up at 2:30 AM and started drinking the second half gallon of GoLightly at 3 AM.  She was done with it by 5 AM, as required, and got me up at 5:45 AM.  We were going to leave for the HFHS Columbus Center in Novi at 6:15 but actually left closer to 6:30.

The traffic inbound to the Detroit Metro Area from the northwest at that hour of the morning is heavy and the slowdowns are ridiculous in the sense that there is no apparent reason for them.  And yet, according to Linda, the traffic comes to a complete stop at approximately the same places every day.  Part of the problem seems to be that people do not know how to merge.  This might be a driving specific manifestation of the more general problems in or society of people thinking they should always come first and being unable/unwilling to compromise.  Another problem is that people speed and tailgate, which means they are frequently on their brakes, the implication being that the rest of us should somehow get out of their way.  Brake lights, in turn, seem to cause a chain reaction and far enough back in the chain traffic can come to a complete halt.  Whatever the causes, we do not drive the highways at rush hour if we do not have to.

We got to the Columbus Center with a few minutes to spare, got a nice parking spot, and went inside.  We found the colonoscopy clinic on the second floor and Linda checked in.  She was the first patient on the schedule for her doctor and did not have to wait very long before being taken in.  The Columbus Center has guest Wi-Fi for their customers and a small self-serve cafe so I went there and had some coffee while I researched flash units and lenses for the Sony SLT-a99v camera that I recently acquired.

Linda’s colonoscopy took less than an hour.  She had come out of the anesthesia, gotten the preliminary results (good), and been discharged by 9:15 AM.  She got dressed and we were on our way by 9:30.  She was hungry, of course, so we went to the Panera on Novi Road just south of Grand River Avenue and had coffee and bagels.  On the way home we stopped at the new Menard’s on Wixom Road just north of I-96.  They had the Eaton RV electrical outlet boxes for the same price as Lowe’s but had a better selection of conduit adapters.  I bought three pieces that together would allow me to connect the bottom of the RV outlet box to the conduit I already had.

We got home at 11 AM and it did not take long for Linda to go to bed.  While she slept I installed the RV outlet box on the post by the new driveway extension and level parking pad.  The first step was to cement a 1-1/2″ to 1-1/4″ reducer into a 2″ to 1-1/2″ reducer which I did in the garage.  The weather was on the cool side of perfect but a nice enough day for working outside with appropriate clothing.  The next step was to determine where to cut off the vertical piece of 2″ PVC conduit so the bottom of the outlet box would be 24″ above the ground.  The pair of reducers would take up about two inches so I marked the pipe at 22″.

The conduit was tight to a 4″x 4″ post and secured by two plastic conduit brackets.  I removed the upper bracket but could not use my Rigid tubing cutter to go completely around it so I used a hacksaw.  I could not just cut all the way through the pipe, however, because of the rope that was inside to be used later to pull wires through the conduit.  I cut a large “V” notch on the side opposite the post, like I would when felling a tree, and pulled the free end of the rope out through the opening.  The notch was horizontal on the bottom and came in at about 45 degrees from higher up.  With the rope out of the way, and secured so it could not fall into the pipe, I continued the horizontal cut and finished cutting through the conduit.

I loosened the clamp holding the bottom of the pipe so I could move the top of it far enough from the post to get some PVC cement most of the way around the riser.  I then pushed and twisted the 2-piece adapter assembly over the 2″ conduit.  Using a short level I plumbed the riser pipe while eyeing its relationship to the post.  Holding the upper clamp over the pipe I secured the clamp with two screws but did not tighten the clamp all the way down.

RV electrical outlet box on top of riser post with level on top.

RV electrical outlet box on top of riser post with level on top.

I set the outlet box on top of the adapters and dropped the third piece through the hole from the inside but did not cement it in.  I used the level to plumb the box, checking it visually in relationship to the post and pipe, and then marked the three mounting holes with a marking pen.  I removed the adapter collar and box and then center-punched and drilled holes for three pan head wood screws.  I put the box and collar back on/in the pipe and secured it to the post with three pan head wood screws.  I then installed the removable panel with the outlet mounted in it.  I coiled up the extra rope, closed the cover, and was done except for getting all of the tools and materials back into the garage.

I checked on the thermometers in the bus refrigerator and recorded the readings.  I then decided to add a duplex AC outlet in the cabinet behind the driver’s seat.  I found a deep plastic single gang remodeling box, a brown duplex outlet, a brown oversized cover plate, and a 30″ length of 14-2+G cable.  I used the box to outline the opening and then completed the lines with a small square.  I drilled out the four corners of the opening with a 1/2″ drill.  I then cut out the opening using a saber saw, finishing some of the inside corners with a hacksaw.  I made quite a bit of sawdust and wood chips so I vacuumed up the mess before continuing with the installation.

The new AC outlet box (blue) installed in the front of the A/V cabinet behind the driver’s chair.

The new AC outlet box (blue) installed in the front of the A/V cabinet behind the driver’s chair.

I turned off the breaker in the inverter subpanel for the driver side AC outlets circuit and verified that the existing outlet was not energized.  I removed the cover plate, unscrewed the duplex outlet, and pulled it out.  I opened a second access hole on top of the outlet box and then prepared the cable by removing about 4″ of the sheath and stripping about 3/4″ of insulation off of the wires.  I fed the cable through the hole and connected the wires to the appropriate screw terminals.  I turned the outlet over so the round ground pins were at the top rather than the bottom, screwed the outlet back into the box, and put the cover plate back on.  I had hoped to finish the whole job before dinner but dinner was ready so I went inside to eat.

For dinner Linda made a salad and Garbanzo beans with onions and Swiss chard lightly sautéed in olive oil.  It probably had a little garlic and might have had a few hot pepper flakes as Linda often uses these ingredients, but I don’t know for sure as I am wrote this post two days later.

After dinner I finished installing the new outlet.  When I put the oversized cover plate on it appeared to be close enough to the top edge of the cabinet that it would interfere with the Corian top.  No big deal, I would just swap it with the regular size plate on the original outlet.  When I went to take the first cover plate off I noticed that one of the outlets was cracked in half horizontally.  I will have to replace it but did not feel like getting into that this evening with the light and my energy fading.

It had been a long day, and I was admittedly tired and contemplating an earlier than usual bedtime, so I locked up the bus and went into the house for the evening.  We turned in at 9 PM and were asleep by 10.


2015/10/21 (W) Electrifying

In spite of being out later than usual last night Linda was up early and off to the bakery at 6:15 AM.  I got up at the same time and made coffee so Linda could take some with her.  Neither of us slept well as we had larger meals, with richer food, and later at night than usual.  I wasn’t hungry but I like to start my day with coffee and it seems to help keep me regular.  TMI, perhaps, but there it is.  I had to get up anyway to prepare the garage so the electricians from Bratcher Electric could get to the areas they needed to work on.  But first I put a load of laundry in the washing machine.

We had a light but steady rain last night starting around midnight.  Phil was hoping for rain over the next few days as the sand base for the driveway will compact much better if the sand is moist.  We have a 70% chance of more rain during the day today and into the evening but by tomorrow a cold front is supposed to push through with much cooler and drier conditions behind it.  I hope the sand gets wet enough to stay moist until Saturday when Phil returns.

Jeremy and Pete from Bratcher Electric showed up at 9 AM.  I walked them through the job and then left them alone to work except for the occasional photograph and questions.  The questions were for my own understanding of the work.

I needed to mix the “GoLightly” prescription for Linda and get it in the refrigerator to chill.  The instructions said to use lukewarm drinking water.  I drew a large pot of our RO water, heated it on the stove, let it cool to what I judged to be lukewarm, added it to the jug, shook it well to mix, and put it in the fridge.  It should be plenty cold by the time she gets home this afternoon.

I was not going to get involved in my own construction projects while Jeremy and Pete were here.  At some point towards the end of their work they were going to have to turn off the whole house generator and disconnect the main service coming in from the utility pole so they could safely tie in the new disconnect that feeds the panel in the garage.  I went ahead and turned off the HP Color LaserJet printer, the two NAS units, and all of the computers except one that was installing updates, and I shut it down when it was done.

While the electricians worked I did some more photo product research.  Based on what I found on the Quantum Instruments, Inc. website they do not make anything that works with the Sony alpha camera bodies, including the SLT-a99v.  Thus it appears that there is no point in repairing (replacing) one or both of my Quantum Turbo battery packs.  I tested my Sunpak DX-8R ring flash the other day so I know I can trigger it but I do not know if I can control it.  My Metz 45CT-4 can operate off of AA batteries but I have not had time to test it with the a99.  Like the ring flash I expect that the a99 will be able to trigger it but I doubt it can control it through the lens (TTL).  If it can then I would have a reason to repair/replace at least one of my Quantum Turbo battery packs.

What all of this means in the short term is that I am going to have to buy a Sony “on-camera flash” designed specifically to work in an integrated way with the a99 body.  Further research revealed that there are only three choices: the HVL-60AM, the HVL-43M, and the HVL-20 (?)  I downloaded the manuals for the 60 and the 43 models and glanced at them, but they are as long as the manual for the camera body.  The 60 has an optional battery pack, but it just holds six AA batteries in addition to the four in the flash unit.  I looked at reviews on the B&H website and they were mixed for both the 60 and the 43.  The 60 is more powerful but is very large.  The 43 is smaller but less powerful and lacks the connector for an auxiliary battery pack.  The biggest knock on both were the mechanical attachment to the camera and an over temp feature that seems to erroneously shut the unit down after just a few quick flashes.

The small box upper left is the new 100 A main disconnect for the electrical panel in the garage.  The large box upper right is the automatic transfer switch and the large box below it is the 200 A service entrance disconnect.

The small box upper left is the new 100 A main disconnect for the electrical panel in the garage. The large box upper right is the automatic transfer switch and the large box below it is the 200 A service entrance disconnect.

After the electricians were gone I heated up a can of Amy’s Red Lentil soup and had some hummus and pretzel nibblers.  I put another load of laundry in the washer and then went in search of an RV outlet box.

Lowe’s had an Eaton box with either a 30 A or 50 Amp single plug and no disconnect or circuit breaker.  The 50 A version is what I installed three years ago for the pull-through drive in front of the house.  What I had forgotten, apparently, was that the largest opening on the bottom of this box was smaller than 2″ but I could not determine if it was 1-1/4″ or 1-1/2″.  Lowe’s did not have the adapters I needed so I went to The Home Depot.  They did not seem to have what I needed either so I went to City Electric Supply.  CES had a better selection of adapters and also had RV panels with circuit breakers.  The panels were much more expensive so I did not buy one but I had them set up the pieces to adapt from 2″ conduit to 1-1/2″ pipe thread.  I then went back to Lowe’s and bought the 50 A outlet box.

Back at the house I spent some more time in the bus fiddling with the remote temperature sensors in the refrigerator but otherwise did not accomplish much.  Linda got home late in the afternoon but was not able to eat anything because of her colonoscopy tomorrow morning.  I was on my own for dinner but do not recall what I had as I am finishing this post a couple of days later.  Linda had to consume half of the GoLightly (1/2 gallon!) between 6 and 8 PM.  I worked in the garage for a while removing the knockouts from the bottom of the RV box.  That was when I confirmed that the hole was sized for 1-1/4″ conduit, not 1-1/2″.  I worked in my office at my computer for the rest of the evening.  We both went to bed before 10 PM as Linda had to get up at 3 AM and drink the other half gallon of GoLightly between then and 5 AM and I had to be up at 5:45 AM so I could get her to HFHS Columbus Center in Novi by 7:15 AM.  Sometimes the scheduling of medical procedures just leaves me shaking my head.


2015/10/16 (F) Desk Installation

We were up at 8 AM, fed the cats, made coffee, and had breakfast.  Phil showed up around 8:30 AM, unloaded his front loader, dropped his flatbed trailer, and left in his dump truck.  I turned on the fireplace and we enjoyed our coffee while iPading until 10:15 AM.

Our first task today was to cut up several large limbs that I pulled out of the woods last evening to get them out of Phil’s way.  I cut them up with the chain saw and then we stacked them on the disposal pile for Phil to haul away.

Phil returned at 10:30 and moved his Caterpillar 305C excavator into the woods across the street by the culvert.  I went down to chat with him briefly to make sure I understood what he was going to work on.  There were a lot of small trees (3″ diameter), saplings, and bushes scattered around the site.  Some of them had been dead for years and some had just been knocked over by Phil.  I decided to work in that area with my chain saw cutting everything up into five foot lengths so Phil could use his front loader to get them into his dump truck.  I worked at this until 11:30 AM and then turned my attention to the bus.  Linda worked on her needlepoint while I cut wood.

Before getting started on construction tasks I took two pieces of filter material and set them on the wire shelf in the freezer compartment of the new refrigerator, one on top of the other.  I then set the two remote thermometer sensors on the filter material.  Butch had suggested the other night that I set the sensor on a sponge to get it off of the floor of the freezer compartment as it was likely responding to the automatic defroster heat strips when they come on.  I figured the filter material would work just as well and that placing the sensors on the shelf would definitely get them away from the floor.

Linda brought out a bag of ice from the house fridge and put it in the bus freezer.  She also filled several 1/2 gallon juice and milk cartons with water, put the caps on, and put them in the fresh food compartment.  The purpose of all of this was to add thermal mass to the compartments to cause the refrigerator to run less often and reduce large swings in temperature.

Inside the bus our first sub-project was installing the desk, which included putting the front passenger side HVAC duct cover in place even though it is not finished.  It took us quite a while to get everything positioned just right.  With Linda holding things in position I screwed the right pedestal to the wall, adjusted the position of the base and screwed the pedestal to the base.  We then repeated that process for the left pedestal and base.

Linda removes the backing from the double-sided tape on the back side of the air grate in the center connector/cover for the desk.

Linda removes the backing from the double-sided tape on the back side of the air grate in the center connector/cover for the desk.

At this point we had several things to do with, and under, the center connector/cover so I removed it and took it into the garage/shop.  We cut a piece of the decorative brass colored metal grate and secured it to the back of the air opening with small screws every few inches.  Next we cut a piece of black plastic mesh to fit over the grate.  We then cut pieces of 3M Extreme Mounting Tape (double-sided) and attached them to the back side of the grate in between the screws.  Linda peeled off the protective layer and we carefully placed the plastic mesh.  Using one of the scrap pieces of the protective layer I rolled the plastic into the take with our wallpaper seam roller.  Finally, we had a piece of filter material already cut to cover this air intake opening so we set that on top of the mesh, pressed it down to take advantage of the tape, and then secured it with Gorilla Tape on all four edges, rolling it with the seam roller to get good bonding.

A detailed view of one of the homebrewed tongue and groove alignment assemblies made from flat mending plates.

A detailed view of one of the homebrewed tongue and groove alignment assemblies made from flat mending plates.

Back in the coach I had to tie in the outlet strip to the 120VAC power feed.  I shut off the breaker for this circuit and checked with my tester to make sure it was not live.  The hot and neutral wires were accessible but the ground wires were back under the left pedestal where they were not easy to reach and manipulate.  It took a while, certainly longer than it should have, but I got the three ground wires tied together with a grounding clamp.  I connected the hot and neutral wires (three each) relatively easily using wire nuts.  I turned the circuit breaker back on and checked that the outlet strip had power between the correct terminals and did have power between any other terminal pairs.

I went to the garage to get a four foot long piece of 1″X1″ aluminum angle that I bought weeks ago to use as a support bracket for the upper rear edge of the center connector/cover.  I was going to cut off a 26″ long piece and then drill countersunk holes but I noticed a piece of 1/2″X1/2″ light gage angle that was about 26″ long and already had holes in it.  It was long enough to span the space between the pedestals and go under each one about an inch.  That was sufficient to position it correctly so Linda held it there while I secured it to the wall with four round (pan) head screws.  I then put the center connector/cover back in place.

Phil has cleared all of the organic debris from the area where the driveway extension and RV pad will be located.

Phil has cleared all of the organic debris from the area where the driveway extension and RV pad will be located.

Phil starts trenching and placing the plastic drain tile tubing for the French drain.

Phil starts trenching and placing the plastic drain tile tubing for the French drain.


Phil had long since left in his truck to dump all of the wood debris.  We had a light lunch of Amy’s Lentil Vegetable soup and fresh organic grapes.  While we were eating a group of three deer came to our back yard and eventually ended up eating apples that had fallen from our tree onto the ground.  These same deer, along with two others, were here yesterday at twilight and were very frisky.  We saw them later in our neighbor’s yard across the street.

Another view of Phil’s smaller excavator with the 12” bucket being used to trench the French drain in the southwest portion of our property.

Another view of Phil’s smaller excavator with the 12” bucket being used to trench the French drain in the southwest portion of our property.

Phil returned around 3 PM and started working on the French drain.  He replaced the 30″ wide toothed bucket with the 12″ one and started at the high end if the culvert on this side of the road.

The grand finale was the installation of the Corian desktop, which has been sitting on a blanket in the middle of the living area floor since Tuesday.  I drilled countersunk holes through the four corner plates in each desk pedestal from underneath.  I then inserted 1-1/4″ #8 self-drilling outdoor wood screws into each hole, again from underneath, until they just protruded above the corner blocks and then backed them off until the tips were just below the surface.  We set the desktop across the pedestals and pushed it as tight to the back and right end wall as we could.  Linda put her weight on it and I ran the screws home, pulling the top tight to the pedestals.  We reinstalled the four drawers in the right pedestal, finally getting them off the floor in the hallway where they have been since Tuesday.  We stepped back to admire the desk and agreed it was a thing of beauty and a joy to behold.  Linda also marveled, once again, at how much space she now has to work in the kitchen.

A wider shot showing the excavator and drain tile.  The laser level is at the left edge of the frame.  The main arm of the excavator (with the bucket attached) has a laser sensor on it that tells Phil exactly where the lower edge of the bucket is relative to the laser level.

A wider shot showing the excavator and drain tile. The laser level is at the left edge of the frame. The main arm of the excavator (with the bucket attached) has a laser sensor on it that tells Phil exactly where the lower edge of the bucket is relative to the laser level.

The “denouement” was mounting the outlet strip and adding felt pads to the two fake drawer fronts on the left pedestal and then adjusting the magnetic catches.  I originally had the outlet strip (temporarily) mounted to the wall between the two pedestals with two screws a few inches below the cord notch in the center of the back edge of the desktop.  Rather than put it back there I decided to mount it on the underside of the desktop just in front of the cord notch.

The underside location will work just as well as the wall mount location for regular 2- and 3-prong plugs but probably not as well for small AC adapters.  The added pluses of this location, however, are: 1) it will not interfere with cords coming through the notch, 2) it will be up out of the way of the UPS (uninterruptible power supply) that will sit on the shelf at the top of the center connector/cover, and 3) if liquids are accidentally spilled and run over through the notch they will not run into the outlet strip.  Besides, devices with an AC adapter will probably be plugged into the UPS so this was a better overall approach.

Our next task was to adjust the sofa seat until it was deep enough to be comfortable.  We slide the plywood seat out a couple of inches and then got the seat and back cushions (three each) from the house where they have been stored since September 21st.  We put the cushions in place and sat down.  We pulled the cushions out and pulled the seat board out until it was five inches farther out than originally designed and put the cushions back in.

The front edge of the seat cushions were out farther than I liked but we both agreed the sofa was now comfortable to sit on.  The distance from the bottom front edge of the back cushions to the front edge of the seat cushions was originally only 16 inches and that turned out to just be too short.  With the seat board moved out it will now be 21 inches.

In order for the sofa to work correctly, both as a sofa and as a bed, we will need a cushion that is 5″ wide by 6″ high, by ~76″ long to fill in the space behind the seat cushions and below the back cushions.  The height and foam makeup will be such that it is level with the tops of the seat cushions and have the same firmness and feel.  Would that I had designed the sofa for this depth to begin with and had the seat cushions made accordingly, but we were trying to open up the living room by not having the sofa protrude into the aisle any more than absolutely necessary.

Next up was reinstalling the wood trim in hallway.  We have an interesting plan for the lower half of the hallway but in case we do not get it finished before we leave for the winter we wanted the trim off the bed and back on the wall.

The lower outside hallway wall.  There were originally three framed panels of vertical strip mirrors here.  We will replace them with wood panels, probably in a lighter color to contrast with the walnut trim.

The lower outside hallway wall. There were originally three framed panels of vertical strip mirrors here. We will replace them with wood panels, probably in a lighter color to contrast with the walnut trim.

This trim originally framed three panels of vertical strip mirrors.  We were able to remove the mirrors as they were glued to wallpaper.  In the process we discovered that the left and right panels were the same width but the center panel was wider.  The trim consisted of six pieces of wood; a long upper and lower horizontal piece and four vertical pieces.  The six pieces were screwed to the lower half of the outer wall but not attached to each other.  The left and right vertical pieces were tight to adjacent woodwork, but the two intermediate pieces were free to be repositioned.

We reattached the upper horizontal piece first making sure the mounting screws went back in the same holes.  Next we pushed the lower horizontal piece into place but did not screw it to the wall.  We then attached the left and right verticals.  The horizontal distance between the inside edges of the left and right verticals was 75 inches.  The two intermediate verticals were each 4-1/2″ wide so the distance between verticals needed to be 22″ (75 minus 9 = 66 divided by 3 = 22).  We carefully positioned and secured the two intermediate verticals to achieve this spacing.

The trim boards all have rabbited edges on the back side.  I need to measure them carefully, but they are ~3/16″ deep by 3/8″ wide.  Our current plan is to use 3/16″ underlayment or other 3/16″ high quality plywood to make three panels that will fit within these rabbits with a little room to spare.  The panels will either have a hardwood face or we will cover them with a hardwood veneer of a wood that contrasts with the walnut trim.  We can get the veneer from Rockler once we decide what we want.

Linda spread out several towels on the new desktop and we moved tools and supplies from the A-V cabinet, behind the driver’s seat, to the new desk.  I then removed the Corian top of the A-V cabinet and put in on the bed.  We still have a small amount of wallpaper to install in the front of the living room and into the cockpit on the driver side, but it will not be easy to do.

These areas, such as the one behind the A-V cabinet, are small with limited access so most of my sanders cannot be used.  The only one that might work is the Porter-Cable oscillating tool but I did not get it out today.  I got some sanding sponges instead and tried those on the wall under the passenger side window trim next to the co-pilot seat.  When I sanded a dark area about 6″ long by 3″ wide the wood in the center crumbled and I ended up with a hole 3″ long by an inch and a half wide.  I could see one of the stainless steel structural members through the hole.  Given what was obviously water damage I was glad we bought a bus with welded stainless steel as the main structural material.

Based on what I could see, the walls in the bus appear to be 1/2″ plywood although I did not measure the thickness.  This area had obviously gotten very wet over a long period of time and some of the wood has rotted.  It is the only spot we have discovered that is this damaged and we immediately realized that we will not be able to wallpaper this area.  We will probably panel over it, similar to what we plan to do with the veneered panels in the hallway, but today was not the day to figure that out.

It was going on 5 PM and we decided we were done for the day.  I turned off all of the electric heaters, turned on the Aqua-Hot, turned on all three thermostats, and set the temperature to 20 degrees C.  The refrigerator was also indicating much colder freezer temperatures than it had been before I moved/isolated the remote sensors so I reset the freezer and fresh food controls to their “normal” center positions.  Tomorrow we will replace the alkaline batteries with the Lithium batteries we bought specifically for the TempMinder thermometer system, reset the min/max data, and monitor it for a few days.

I walked down to see what Phil was doing.  He was making good progress with the French drain but did not have enough of the plastic drain tile to finish it today.  He plans to work tomorrow and will have the additional tile he needs to finish the drain.  I left him to his work and took photos of the fall colors in our yard as I worked my way back to the house.

I spent an hour at my computer dealing with e-mail and transferring photos from the Sony a100 to my laptop.  Linda called me to dinner at 7 PM.  It was a simple meal of vegan Coney dogs with mustard, onion, and beans served open-faced on a whole wheat hotdog bun.  As a side dish Linda steamed Opo squash.  It was the first time either of us had this particular squash.  It was very mild with a hint of cucumber.  It is available all over the world and widely consumed as it is relatively inexpensive.  It was OK, but I thought it might work better as an ingredient rather than a stand-alone side dish.

I exchanged a couple of text messages with Chuck and confirmed that we would be at his shop tomorrow after breakfast to retrieve our two bus windshields.  The rest of the evening was spent in the living room by the fireplace reading and writing on our iPads before turning in and watching episodes of Rick Steeves’ Europe and Joseph Rezendo’s Travelscope on Detroit PBS (WTVS).


2015/10/13 (T) Desk Alignment

I got up at 8 AM, put on my robe, made coffee, fed the cats, and refreshed their water fountain while Linda got dressed and washed blueberries to put in our granola.  We took our coffee to the living room where I turned on the fireplace and we were joined by our feline friends.  I put the finishing touches on yesterday’s post and e-mailed it to myself while Linda pulled up the latest video post from Dr. Michael Greger at NutritionFacts.org.

Linda left at 9:30 AM to meet Diane at Kensington Metropark for their weekly walk.  As this will probably be their last walk together until spring they planned to go to lunch afterwards.  While there was some work I could do by myself on the (permanent) installation of the desk there were other aspects of the job that would definitely require two people.  I needed to finish updating the roster for the FMCA Freethinkers chapter so I spent about 30 minutes reading the manual for the new Sony SLT-a99v camera and then got dressed and worked in my office for the rest of morning.

After a short lunch break I resumed working on the roster until Linda got home.  She and Diane had lunch at Baker’s in Milford as it is close to the Metropark parking lot where they meet.  We removed most of the things from the bus we were not currently using, many of which were stored in the sofa storage box.  We got the sofa seat off of the desk pedestals and set it back in place on the sofa base.

I wanted to use pieces of a 24″ X 30″ furnace filter to cover the various air inlets in the desk bases and the air outlets in the OTR HVAC duct.  The best way to hold the filter material in place appeared to be with some very strong tape.  We did not have any such tape on hand so Linda went to Lowe’s and bought a roll of Gorilla Tape while I cut pieces of filter material to fit the various openings.

The left desk base and passenger side OTR HVAC duct showing the pieces of furnace filter material used to seal these openings while permitting filtered airflow.

The left desk base and passenger side OTR HVAC duct showing the pieces of furnace filter material used to seal these openings while permitting filtered airflow.

We got all of the openings taped up but I still needed to fabricate two tongue and groove alignment devices between the pedestals and the center connector/cover.  I make these out of flat mending plates, one on the pedestal (tongue), and two on the connector/cover (groove).  The tongue is flat against the back side of the pedestal vertical board and protrudes about 1/2″ beyond the edge.  The groove is made from two plates, one stacked on top of the other, attached to the back side of the vertical connector/cover board.  The upper plate is just back from the edge of the board and the lower one (next to the wood) is offset from the edge a little more than 1/2”, just enough to create a space for the tongue.  The tongue and groove devices match two others lower down on the connector/cover.  All four of them are oriented vertically allowing the connector/cover to drop into place and force it to align with the matching pieces of the pedestals.  A pair of horizontal plates, one on each pedestal, provide a resting surface for the connector/cover that aligns it horizontally.

With the devices fabricated we were finally able to set the pedestals on the bases, drop the connector/cover in place, and align everything as if the entire desk was a single unit.  We then got the Corian desktop out of my car, brought it into the coach, and set it in place.  It will require some careful adjustments before we screw everything down but it basically fit properly and looked good.  Final positioning of the left pedestal and base, however, would require us to put the front HVAC duct cover in position.

We got the cover out of the library and into the bus for the first time since we brought it home from Jarel Beatty Cabinetry in Logansport, Indiana.  The length was perfect but the bump out where the heater hoses were originally going to loop through was too deep.    I suspect the mistake was in my design/drawings.  Jarel knew this piece was supposed to line up with the left pedestal and base but I no longer recall if he even had the desk pieces in his possession when he was building the cover.  At this point it didn’t matter anyway.  The misalignment is with the base and is not very visible.  Also, the bump out is screwed on to the main cover so it can eventually be removed and trimmed or replaced with one that has the correct dimensions.

Once we had the cover in place I realized that I also needed to fabricate and install alignment plates between the cover and the left pedestal.  I had not planned on this and did not have enough mending plates so we went to Lowe’s to buy more.  While we were there I bought another can of 40:1 premixed fuel and a bottle of bar and chain oil for the new Poulan Pro 18” chainsaw.  We stopped at Walmart to see if they stocked a particular folding chair made by Stakmore that we have seen online, but they did not.  We think it would work nicely as a desk chair, and go well with the interior materials and colors in our bus, but we would like to see one in the round before buying it.

Back home I worked on the alignment plates while Linda prepared dinner.  We had leftover lentil loaf, microwaved sweet potatoes, and a mix of steamed broccoli and Brussels sprouts.  She added a little water to the lentil loaf before reheating it to moisten it a bit.  We both like ketchup on our lentil loaf and I added some Pick-a-Poo sauce to mine.  All three dishes were served hot, which was comforting on a cool evening, and everything was very tasty including the cup of hot tea.

I returned to the bus after dinner and finished installing the mending plates on the HVAC duct cover.  I was not able to put it in place by myself, and there was no reason to have Linda come out and help at this hour, so I set the thermostats back and locked up the bus.

I called Butch and this time the call went through.  I updated him on the installation and testing of the fan-coil heat exchangers and asked him about the operation of our new refrigerator.  He suggested that I isolate the remote temperature sensors by using pieces of the furnace filter material to keep them from touching an objects or surfaces directly.  He and Fonda are wrapping up at the RV Park in Bouse and moving to Quartzsite on Thursday.  After we were done talking I worked on this post while we watched a few TV programs and then went to bed.