Linda was up at 5:45 AM and off to the bakery at 6:15. I was up at 7:45 AM and skipped breakfast and coffee. I put on Weather Nation and took stock of the forecast while I folded the clean laundry. I took a shower, got dressed, made a cup of tea, and had a small glass of orange juice to wash down my pills.
My main objective for today was to get the bus fueled which would also serve as a test run. The forecast had the chance of rain increasing through the morning and heading towards certainty by early afternoon, albeit intermittent and not very intense. I wanted to take care of the fueling before the rain settled in but wanted to wait long enough for the temperature to rise so I set 11 AM as my target departure time. Before I moved the bus, however, several things had to be done.
First on the list was turning on the electric block heater for the main engine. It wasn’t cold enough for this to be necessary but having the oil warmed up a bit never hurts, especially with the straight 40 weight oil. It helps the engine crank over and get oil to the bearings more quickly.
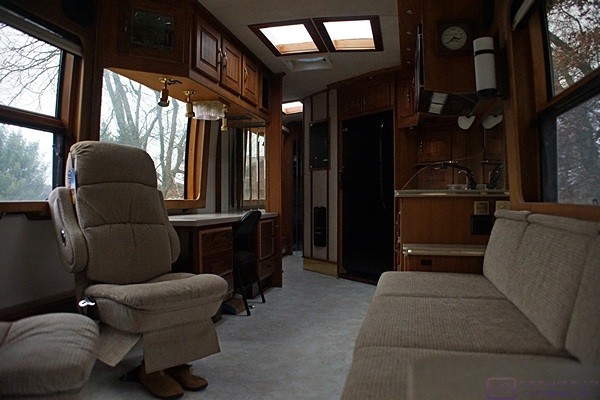
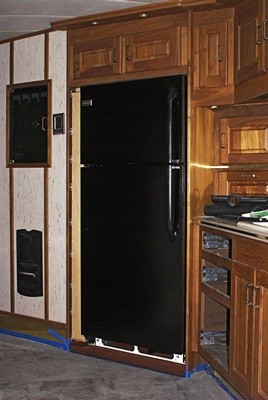
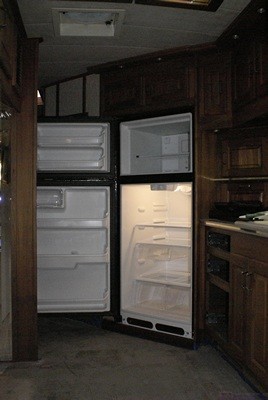
The living room and kitchen in the bus looking aft from the cockpit. New flooring, new seating, new desk, new refrigerator, new slide-out pantry, and new window shades (rolled up).
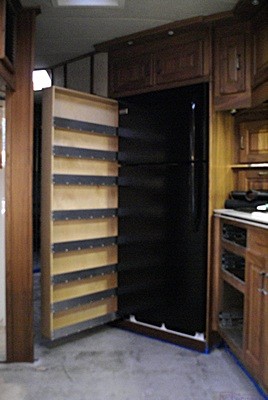
Next was simply cleaning up the interior so the coach could be safely moved and nothing would get broken. I gathered up all of the tools and materials that I no longer needed and moved them into the house and garage. I then installed the solid brass door stop on the bottom of the pull-out pantry. Finally I mounted the two aluminum angles to the inside of the refrigerator alcove, one by the freezer door and the other by the fresh food door.
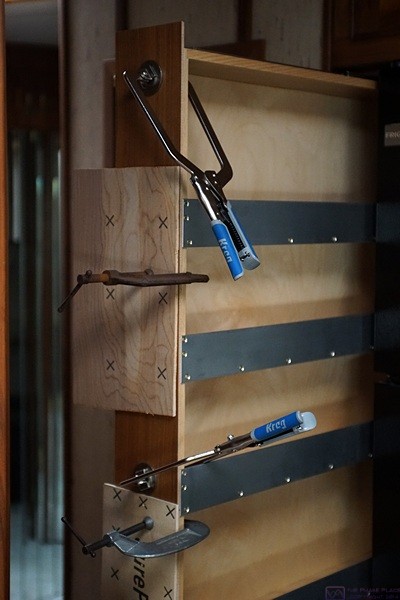
The angles were 1/2″x3/4″ with holes drilled in the 3/4″ flange for #6 SR self-drilling wood screws. I had carefully countersunk (chamfered) each hole so the screw head would be close to flush with the surface of the flange. The aluminum was only 1/16″ thick so I had to be careful not to overdo it. With the freezer door open I set the 1/2″ flange against the face of the refrigerator case (on the side opposite the hinges) and held the 3/4″ flange square to the side of the alcove. I used a #5-6 self-centering VIX drill bit to drill three holes about 3/8″ deep and installed the 5/8″ #6 screws with a manual screwdriver so as not to over torque them. I repeated the procedure for the second angle which was longer and had five mounting holes.
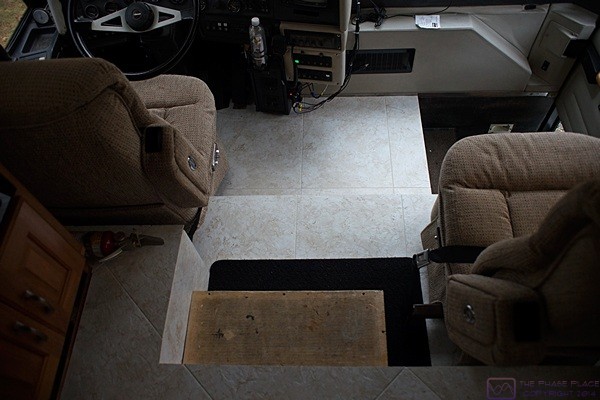
The new floor in the cockpit of the bus.
I had a little spare time so I drove my car up and down the new driveway to compact the gravel. I won’t drive the bus on this new driveway until next year but it already supports the cars very nicely and the weight of the Honda Element was sufficient to knock down some of ridges and compact the surface.
I checked all of the tire pressures and they were OK so I did not have to get out an air compressor and adjust them. I will have to do this next week before we leave, however, as the temperatures will have cooled off significantly by then.
Around 11 AM I turned on the coach batteries and opened the auxiliary air supply valve for the engine accessories. I turned off all of the electric heating elements and made sure the inverter was turned on and then started the main engine. I let it run for one minute and then switched it go high idle. While the engine was warming up and the air pressure was building I shut off the shorepower, disconnected the power cord, and stowed it.
I pulled out at 11:15 AM and headed for the Mobile Truck Stop at exit 122 on I-96, approximately 22 miles from the house. While there are a couple of closer places I could get fuel this truck stop has very good egress and is fairly busy, which means the fuel is being turned over frequently and is thus relatively fresh. The drive is a mix of Interstate and Michigan Highways with a few stoplights and a couple of miles of dirt road, so the bus has to run up and down through its gears. It is also a long enough round trip to get the engine up to normal operating temperature under load.
I estimated that the tank would take on about 120 gallons of diesel fuel so I added two bottles of Stanadyne Performance Formula and one bottle of Stanadyne Lubricity Formula. The tank started whistling at 112 gallons, which meant it was getting full. I added the last few gallons by controlling the flow manually and stopped at 119.990 gallons, so my 120 gallon estimate was pretty good. I paid for the fuel and got a free beverage to go with it.
I had some occasional light rain on the drive out and on the drive back but the trip was otherwise uneventful. I was back at 12:45 PM, parked the coach, and started the auxiliary generator, which I had not done for several months. To load the generator I turned on all three electric toe-kick heaters, the engine block heater, the Aqua-Hot electric heating element, and front bay electric heater. I let it run for 90 minutes with an average current draw of 25 Amperes on each leg, which is about 35% of its full load capability.
I got the shorepower cord out and connected it but did not turn it on. As long as I had water and air pressure I flushed the toilet and then ran a little water through the various faucets in the coach. I set a rubber door mat under the drain for the fresh water tank to keep the water from drilling a hole in the driveway and then let the tank drain slowly. While it was draining I got the long fresh water hose out and connected it to the spigot on the front of the house and the water port for the coach. With the fresh water tank empty I checked that the outside water spigot was configured to provide filtered/softened water. I closed the drain valve, opened the fill valve, and opened the valve at the house. I then went in the house, set a timer, and had a bite of lunch.
I had a phone call while I was driving back from the truck stop but did not answer it. The caller left a message so I listened to it and then called him back. Kevin Stufflebeam, from the southwest part of Michigan, had a 1995 Marathon Prevost conversion with a non-functioning Webasto system. It turned out that he had the system worked on by a company in that area and the guy from the company had called me during the summer. They got my name and contact information from Josh Leach at Coach Supply Direct, with my permission.
The fresh water tank has an overflow tube so that is how I knew it was full. I closed the fill valve on the bus, closed the spigot valve at the house, and then opened the fill valve to relieve the pressure in the hose. Sure, it was a lot of back-n-forth, but it eliminated the spray that occurs when unscrewing a fitting on a pressurized hose. It also makes the fitting easier to unscrew. I removed the hose from the coach and then from the house. The spigot is about four feet higher than the driveway so I pulled the hose up towards the spigot, allowing it to drain as I coiled it up. Once it was coiled I connected the two ends together, put it back in its storage tub, and put the tub back in the front bay.
Linda called at 4:30 PM to say she was on her way home. It had been raining, off and on, all afternoon so I took about 45 minutes to drive on the new driveway with my Honda Element and compact it even more. But first I got the metal toothed rake and evened out the few remaining ridges and valleys. Besides going up and down the driveway I drove across it at various angles at both ends. Most of the driveway has fresh topsoil along both edges, which is soft and has grass seed and straw on top of it, so I stayed off of those areas as they definitely should not be compacted. The end of the new driveway by the house ties into our concrete driveway and some solid, undisturbed lawn with a flare. The far end, which ties into the street at our third culvert, is much wider (to allow the bus to make the turn), relatively flat, and ties in to solid, undisturbed lawn. The concrete, road, and undisturbed lawn allowed me to drive beyond the edges of the driveway in these areas and go across them at various angles.
Any kind of weather always slows commuter traffic and Linda did not get home until 6 PM. It had been a long day for both of us and she just wanted to relax for a while. She opened a bottle of Barefoot Moscato and poured each of us a glass. For dinner we had mock oriental orange chicken with reheated frozen broccoli and white rice with soy sauce. It was an easy but very tasty meal.
After dinner I finally settled in at my desk to finish updating the FMCA Freethinkers Chapter roster, financial statements, and minutes from the 2014 annual meeting. Linda reviewed the financial statements and helped me reconcile them to the bank statements. Once we were satisfied they were accurate I saved everything as PDFs, uploaded them to our Dropbox, and sent the folder link to the members via e-mail. We then headed to bed and watched the last episode of The Brain on Detroit PBS. Linda went to sleep and I wrote for a while, finally turning the light out at 11:30 PM.