Linda is still fighting her cold and I was up way too late last night so we slept until 9 AM this morning. Because we were getting a late start, and neither of us was hungry, I made coffee but we skipped breakfast.
It was 51 degrees F in the bus so I turned on all three electric toe kick heaters and put on my zip front sweatshirt that I use to work in cool situations. We took all of the freezer packs out of the house refrigerator freezer compartment and moved them to the freezer compartment in the bus fridge. Linda also filled four large containers with water and snapped the lids on. We put those in the refrigerator compartment on the bus, turned on the power, and put the wireless remote thermometer in the freezer compartment.
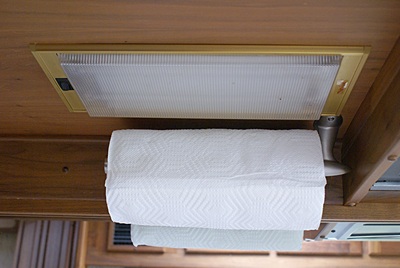
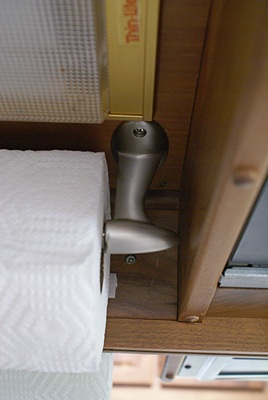
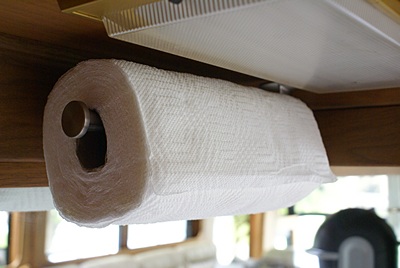
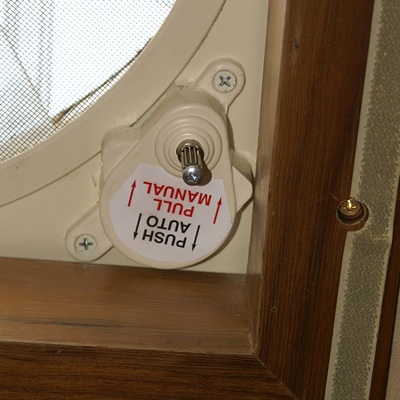
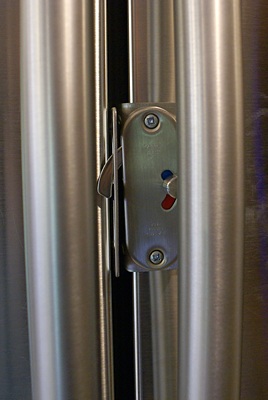
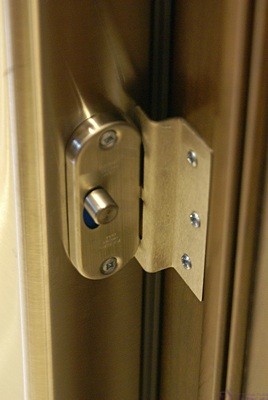
I was going to raise the front of the refrigerator until the top hinge for the freezer door just touched the ceiling of the alcove but our relatively inexpensive model apparently lacks that adjustment. Linda was also concerned about how we will latch the doors for travel. She remembered seeing a very clever latch for a fridge with doors like ours at the GLAMARAMA rally in early June and found a picture of it on her phone. It is actually fairly simple and if custom made could be installed using the holes for the center hinge (between the doors) on the handle side (right side) of the fridge.
(I still like Scott Bruner’s solution best. He devised an electromagnet system that is activated by turning the ignition on but has an override switch. He and Tami have a cafe door, bottom freezer drawer unit. One electromagnet holds plates on top of the cafe doors where they meet at the center of the fridge. A second electromagnet is mounted on the right side of the lower case and holds a plate on the side edge of the freezer drawer front. Very clever, and very fail safe.)
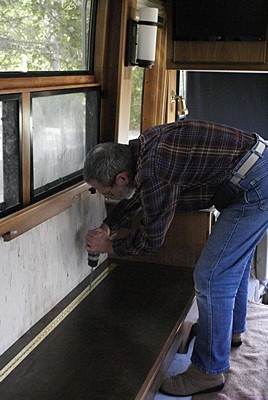
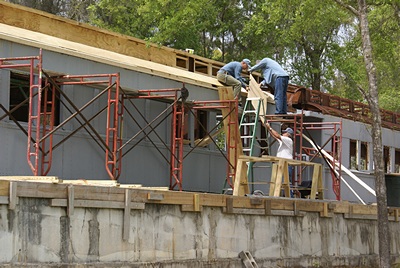
Bruce installs the fixed side of the piano hinge to the top of the wiring chase above the OTR HVAC duct.
Our first construction task for today was to finish installing the built-in sofa. This was a semi-permanent installation with everything in its final place and screwed in. We will have to disassemble it once to finish cutting it and screening off the openings in the OTR HVAC duct and to drill the 4″ diameter holes in the vertical front panel for the circular registers. We also need to find a pair of suitable length lifts to support the seat in the open position. Finally, we need to find and mount some 12V DC LED lights and replace the momentary contact switches in the aft end cabinet with on-off versions.
It took us until 12:25 PM to finish the sofa (for now). We took a brief break and had an apple for a snack. Our next task was to put the plywood bed platform back in the coach. That sounds simple enough but we knew from taking it out that it would be difficult to put back in. The platform is the size of a queen size mattress, in two sections joined by a piano hinge. It’s big, bulky, and very heavy, with no good handholds but we managed to get it into the bedroom and setting flat on the storage box base.
The physically hard part was behind us but now we had to get the fixed part of the platform screwed back down to the base, requiring us to put 18 screws back in the holes they came out of. I rewired the aisle lights before we did that as I was easier to get to the wires. We used two screws to index the location, checked the reveal along the length of each side, and screwed it down. I then reconnected the two gas springs while Linda held the platform up. I also connected the wiring for the two cargo lights but they did not come on. I will have to change the bulbs and see if that’s the problem but for now we had more pressing tasks.
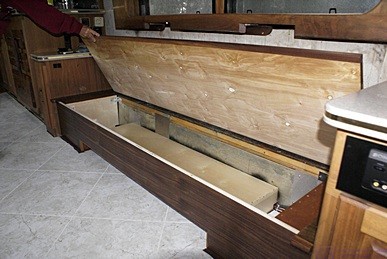
A view from near the co-pilot/navigator seat of the built-in sofa with the hinged seat base lifted up to reveal internal pieces and storage space.
We went inside, each had an apple, and then returned to the bus. I had planned to temporarily mount two 12V DC switches but did not have time to fabricate a temporary mounting plate. We needed the switches hooked up so I just reconnected the female spade connectors on the cable to the spade lugs on the switches and draped the wires over the arm of the passenger chair.
Our next task was to temporarily install the desk. The installation was only temporary in the sense that we would need to disassemble it to get the Aqua-Hot fan-coil heat exchangers installed in the bases. My preference was to get the heating system configured as part of the desk installation but we ran out of time before our appointment at Coach Supply Direct.
Our first sub-task was to cut the 1/4″ Baltic birch plywood spacer to fit on the right side of the right pedestal/base. I cut it to be shorter than the desk and not as deep as the base, which is recessed at the front to create a toe kick space. I cut the lower back corner out so the space would fit around the HVAC duct / wiring chase. We peeled off some clear tape from the mirrors in the right rear corner down below the level of the top of the desk and set the spacer in place.
Our next task was to redo some AC wiring to get power to the space between the pedestals and reconnect the passenger side front duplex outlet. To get power to the interpedestal space I decided to run 2C+G (Romex) cable from the wiring chase through a hole in the bottom of the pedestal, up the inside rear left, and out through a hole in the upper rear left side. This hole and cable will not be visible unless someone crawls under the center of the desk.
In order to get the cover/shelf in the foot well aligned with the left and right pedestal/base components I decided to use mending plates attached to the back side of the bases and pedestals. We started with the right hand components. I attached a plate to the back side of the left rear base projection and one to the underside of the left end of the upper bottom section of the pedestal. We set the base in place, put the pedestal on top of it, and set the cover/shelf in place.
We carefully shifted the components until we had them aligned the way we wanted. I then secured the pedestal to the wall (which is 5/8” or 3/4″ plywood not sure which) with a single screw through the back panel centered from side-to-side and a couple of inches down from the top edge. We double-checked the alignment of the pieces and then secured the pedestal to the base with three screws. The base is not screwed to the floor or anything else except the pedestal.
We set the left base and pedestal in place and fussed with the alignment for but it was already 4:15 PM. We had planned to quit working at 4 PM to get cleaned up for our SLAARC meeting and have dinner. We still have a lot to do tomorrow for me to be ready to leave on Tuesday morning, but it should be manageable.
We went to Panera in Brighton for dinner and both had the Edamame Soba Noodle Bowl. It was a generous serving that was tasty and filling even though it was only 390 calories. It was very high in sodium, a common but unfortunate problem with most of Panera’s food, so not something we would eat often.
We arrived at the South Lyon Witches Hat Depot Freight House at 6:30 PM for the monthly meeting of the South Lyon Area Amateur Radio Club (SLAARC). We had a larger group than usual, at least 30 people. The business meeting was brief and followed by a program by Steve (N8AR) on the Yaesu Fusion technology. Steve and several other club members brought different radios to demonstrate and let the attendees try.
We left in time to get home by 9 PM and watch an episode of Sherlock on Detroit PBS, followed by Rick Steve’s Europe and then Music Voyager. We’ve been working long, hard hours and it was nice to take an evening to relax and do something other than work on the bus.