It had cooled off in the coach by the time I went to bed late last night but I was surprised that it dropped to 58 degrees inside given that the outside temperature only fell to 48 degrees. I was slightly cold much of the evening even though I had the electric heating pad turned up to ‘3’. Linda is always telling me to just pull up the extra blanket at the foot of the bed but it usually has cats curled up on it so that often doesn’t really work. Besides, she does not want it up on her side of the bed so that doesn’t really work either. The ultimate cure was to get up, put on my sweats, turn up the thermostats, and make a pot of coffee.
I waited for an hour after breakfast to let the outside temperature warm up a bit and then got to work replacing the Aqua-Hot drive shaft bearings. I borrowed three hose pinch clamps from Butch yesterday as I knew he and Fonda would be leaving first thing this morning. As the name says, they are used to pinch hoses closed so nothing can flow through them. I needed the clamps to pinch off the diesel fuel supply and return lines to the Webasto burner so I could remove it to work on it.
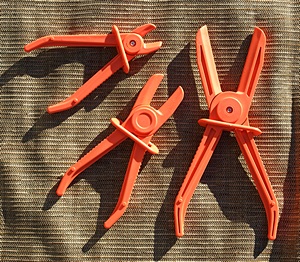
Hose pinch clamps.
While I got started on the Webasto repair Linda gathered up a couple of loads of laundry and worked at her computer while the laundry washed and dried. She hooked her laptop up to the TV/monitor in the bedroom and her screen returned to normal brightness. Go figure.
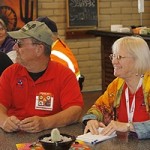
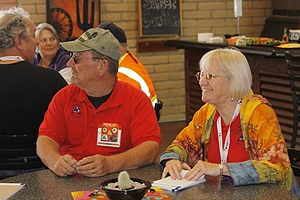
The SKPs had another happy hour from 1 – 3 PM today but we did not go because I was still working on the Webasto burner. As we were leaving yesterday we had a nice conversation with Dortha Hall about Bentsen Palm / Retama Village in Mission, Texas. We have talked to representatives of BP/RV at several rallies and are on their e-mail marketing list. BP/RV is a planned development with everything from RV pads to multi-bedroom homes with two-car garages and RV ports. Online it looks like a nice place and Dortha confirmed that impression. At least she and her husband, Mark, really like it there.
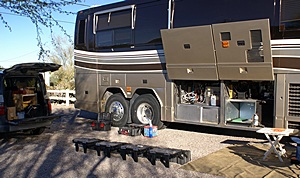
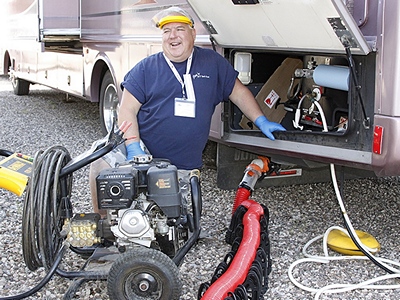
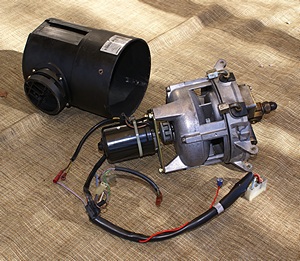
The Aqua-Hot bay with tools positioned to work.
She and Mark have an RV pad with a coach house near the front of the park. The coach house is 12’x20′ and is intended to be a guest house but can be lived in as it has a kitchen, bathroom, and laundry facilities in addition to more room than a typical RV interior. They are also allowed to rent/lease their RV space when they are not there. They can handle the rental themselves or put their lot in the rental pool and let the Village management handle it.
The service and repair manual for the Webasto DBW2010 is quite detailed and gives step-by-step instructions on how to disassemble, repair/replace, and reassemble every component in the system. What it does not contain are the tips and tricks that experienced service technicians use when things do not work exactly as written.
By way of example, the plastic housing that covers the motor and blower assemblies is held on by four screws and is sealed with an O-ring on the end that mates with the nozzle and pump support plate. The directions say to “… remove the four screws and pull the housing off.” Yeah, right. It took me an hour to figure how to get the cover off without breaking it. And yes, that was after removing the four screws.
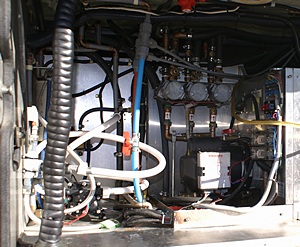
Cowling removed from Aqua-Hot revealing the burner and controller.
We knew the unit was running rich because of the visible black exhaust smoke when the burner was on. And I knew that combustion byproducts we’re finding their way into the pump/burner compartment because there was a fine soot on lots of things in there. Still, I was surprised by how much soot was inside the cover and inside the blower once I got it disassembled.
There were several things like this that did not just work as described, but my favorite was the one that said to disconnect the fuel lines, unplug the wiring harnesses, and remove the burner assembly. No problem, except that the harness is hard-wired on one end to various thermostats inside the case and part of the other end disappears inside the cover (which I had not yet figured out how to remove). I cut the four thermostat wires and later spliced in a mating pair of 4-flat trailer lighting connectors. These connectors are keyed so as long as I wired them correctly I could not plug them in the wrong way.
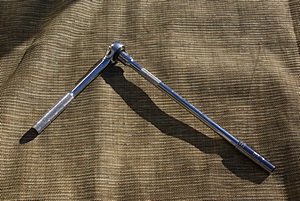
Ten inch ratchet extension with 10mm socket.
I got all of these kinds of things figured out in the end but it took a lot of extra time. Two runs to the tool store, one for an air nozzle and one for the trailer connectors, took more time away from actually working on the unit. But I got the burner disassembled to where I could access the main shaft bearings and removed all of the old components. As long as the burner was disassembled I cleaned everything I could using compressed air and Simple Green degreaser with paper towels and Q-tips, being careful not to degrease bearings, gears, or other parts that needed to remain lubricated.
The bearing kit had about 12 parts but the diagram and directions made it very clear exactly how they were to be installed and they went together as described without difficulty. When we spoke to Lloyd DeGerald yesterday he shared a tip (trick) with us to “… tighten the nut until the (thing) just starts to bind and then back it off 1/4 turn.” That sounded great yesterday but was a lot less clear today. I eventually figured out that the nut he was talking about was the Nylok that was the last piece to go on the drive shaft as part of the bearing kit. I also figured out that the “thing” that “just starts to bind” was probably the plastic blower and that what it binds with is the aluminum casting where the bearings are installed.
The burner assembly removed from the combustion chamber showing the fuel nozzle and spark ignition electrodes.
The instructions tell you to tighten the Nylok using a feeler gauge to set the gap between the blower and the case casting and that the gap is critical. A little too tight and the blower will rub on the casting, dramatically reducing its rotational speed. Too loose and the blower will leak. In both cases it will not supply sufficient air to the combustion chamber, resulting in a rich mixture. (Worn bearings will also slow the rotational speed of the blower and anything that slows the rotational speed of the main shaft also slows the fuel pump RPM and pressure.) Lloyd apparently does not bother with the feeler gauge and has learned that backing the nut off 1/4 turn sets the correct gap. Yeah, but only if you have the experience to know what “just starts to bind” feels like. I set the gap visually, tightening the Nylok as much as I was comfortable, backing it off slightly, and then spinning the blower while observing the gap all the way around the casting. The blower spun freely so I presumed it was not binding, and the gap seemed fairly small.
With the bearings replaced I reassembled the blower housing, mounted the motor, positioned the wiring harness, put some Syl-glide on the new O-ring and slipped it over everything and positioned it in its groove. I applied a little more Syl-glide all the way around the O-ring and on the four mounting ribs that support the cover. I then routed the two wires for the ignition coil out through the small hole towards the rear of the cover and tried to slide it into place. Yeah, right.
The four mounting ribs are serrated (for added grip) and the cover gets tighter the farther it is pushed on. It had to be oriented correctly so the ignition coil ended up on top and aligned so the holes for the retaining screws ended up directly over the threaded holes in the ribs. I got the cover oriented and aligned quite well but when it got to the O-ring I was shy by 1/2 screw hole and could not get it all the way on. I tried setting the burner on the end of the cover and using a 1/2″ socket extension to tap on the nozzle/pump casting. I also tried holding the unit and tapping on the end of the plastic housing with a rubber mallet. Patience and persistence paid off and eventually I got the holes aligned and the retaining screws in, but it did not just “slip on.”

The disconnects for the two wires to the flame detector photocell.
I changed the nozzle, slipped a new photocell mounting plate over it, and then positioned the spark electrode gapping tool on the nozzle. I positioned the electrodes and tightened the retaining bracket. I routed the ignition wires, connected the two supply wires for the ignition coil, and mounted the coil on the outside of the cover. We were “on the base leg turning final” (airplane talk) when the first real glitch of the day occurred. I went to re-install the photocell and discovered that it only had one wire but the harness had two connectors. I checked my disassembly notes and it definitely had two wires when I removed it. Bummer, but not to worry; I will just use the photocell from the other (spare, not currently functioning) burner.
I pulled the other burner out of its storage bucket and removed the mounting screw that holds the photocell in place behind an opening in the mounting plate. When I tried to unplug the two banana connectors I discovered that the technician who worked on the burner in Elkhart, Indiana last June had used butt crimp connectors. The photocell was essentially hard-wired. Double bummer. I called Lloyd to see if he had any photocells and what they cost. He was fairly certain that he had some as they do occasionally fail and have to be replaced. He thought the list price was $190 and did not suggest that I could buy it for less than that. Linda got on her iPad and checked Sure Marine Service, where I just got the bearing kit and other Webasto repair parts, and they had them in stock for $124. Big difference, but then Lloyd had them in Quartzsite and SMS would probably take seven days to get them to me.

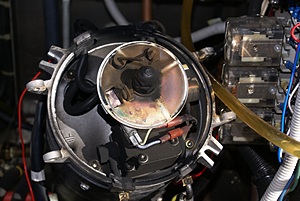
The burner assembly with the outer housing partially off (or on).
It was about this time that Butch and Fonda got back from a day at the Quartzsite Rock and Mineral Club. Butch ended up working on the photocell problem, cutting the wires on the spare and improvising two banana plugs from spade connectors. While he did that I spliced one of the 4-flat connectors to the thermostat wires and the mating connector to the burner harness using butt crimp connectors and being careful to match the wire colors on both ends. I installed the photocell and was finally ready to re-install the burner into the combustion chamber.
By this point the sun had set, it was getting dark and chilly, and Linda, Fonda, and Barb were getting ready to leave to go to a free concert put on by Barry (of Barry’s Breads) and Chas (who works with/for Barry). I had planned to go to the concert put I was close enough to finishing the job that I wanted to stay on task and get it done. I got out my twin-tube fluorescent work light and set it up above the Aqua-Hot.
The burner assembly with the outer housing removed. The motor is to the left and the fuel nozzle is to the right.
I positioned the burner assembly vertically, cover down and nozzle up, and attached the supply and return fuel lines. Keeping the wiring harnesses out of the way I carefully positioned the burner assembly on the combustion chamber, swung the retaining bolts into position, and gently tightened the retaining nuts by hand. When I was absolutely sure I had the burner assembly seated correctly I gently tightened the retaining nuts by hand without a ratchet. I plugged the two 4-flat connectors together, re-installed the Webasto controller, plugged the two controller harnesses into the controller, and connected the red wire to the burner assembly (which I had cut back in October and spliced in mating spade lug connectors). It was ready to fire it up, or so I thought.
I turned on the burner switch by the dashboard and the motor immediately spun up, the blower whirred, and about 15 seconds later we heard the sweet roar of combustion. The unit had a higher pitch, indicating that it was rotating faster than it was previously. I grabbed a flashlight and went around to the other side of the bus to check the exhaust. I was not able to see any visible exhaust, but I will check again tomorrow. The exhaust had a different, more robust, sound like a jet engine and more like what I was used too before we started having problems with the system.
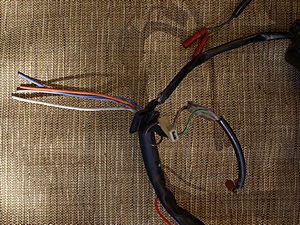
The burner assembly wiring harness.
I had noticed a small coolant leak earlier when working in the Aqua-Hot bay. The leak was from the rubber hose coming out of the top of the check valve on top of the middle zone pump. Bummer, and duly noted, but nothing to be done about it tonight. I put the three-sided stainless steel cover back on the end of the Aqua-Hot as it helps reduce the audible noise level up in the house. As I was re-installing the cover I noticed that there was some liquid around the pressure/filler cap for the “boiler” heat exchanger.
Closer inspection revealed that the clear flexible tubing which connects the filler neck to the expansion reservoir was broken right at the fitting on the filler neck. Bummer, but at least that explained why the level of the fluid in the expansion tank had not dropped all day even though the electric heating element got turned off right after I started working this morning. I had noticed the persistently high fluid level hours earlier, and noted that it did not seem right, but I did not take the time to investigate it then. I removed the spring clamp that was retaining a small stub of hose on the filler neck fitting and removed it, re-routed the hose, slid the spring clamp over it, pushed the end of the hose over the barbed fitting, and slid the spring clamp over it.
The work was done, except for cleaning up the work site and putting tools and parts away, and the Aqua-Hot appeared to be running correctly for the first time in a long time. I gathered up my tools, returning each one to its correct tool box, put the tool boxes away, and stowed the work light and air hose in their designated places. I closed and locked the bays and there was no trace of the long day’s work that had just concluded. I washed my hands as best I could and Butch and I headed over to Crazy Jerry’s for dinner. I had a side order of fries and iced tea. By our request, Donna was our waitress again. She is delightful.
While we were at dinner I got a call from Gary Hatt. He thought perhaps I was going to stop by his coach today, but I reminded him that I had indicated in an e-mail that I was going to rebuild my Webasto burner today, and had only finished less than an hour ago. We will go over and meet him tomorrow. I spent the rest of the evening writing this post and as a result did not get to work on the FMCA NEC seminar categories project, so I will have to make time for that tomorrow. It was a long but satisfying day.