I got dressed this morning for physical work, but ended up doing very little. I worked at my desk most of the morning, including working through the first chapter of the Intro to Linux course on edX. I came up from the basement to have lunch at 12:30 PM after which I moved my car out of the pull-through driveway. I then started the bus and, with Linda’s assistance, backed it out of the pull-through driveway, drove it the short distance to our straight driveway (which ties into the other end of the pull-through driveway), pulled it up onto the concrete driveway as far as it could go, and parked it. The concrete driveway runs uphill from the road to the garage and, not knowing how long it might be there, I lowered the front end and raised the back end; not enough to level it but enough to make it better. Linda chocked the drive tires while I hooked up the electrical shore-power. The front bay had gotten water in it from the recent rains so we opened all of the bays to let them air out while Linda soaked up as much water as she could with a couple of old towels.
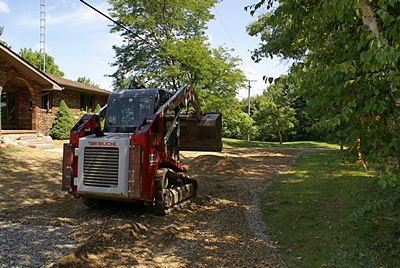
Spreading 21AA road gravel to fix the driveway.
I got out our 8′ step ladder and pole saw/lopper to prune some large (1 – 2 inch) dead branches that were hanging over the pull-through driveway where the rear end of the bus normally sits. I no sooner started this work when Phil from Precision Grading showed up right on time with his dump truck, tracked front-loader, and rolling compactor attachment to repair the damage done to the pull-through driveway by the recent landscaping work.
Phil off-loaded the front-loader from the trailer and then disconnected the trailer from the dump truck. He had a small load of 21AA road gravel (with lots of fines) that he dumped in two different spots in the pull-through driveway. He then put the truck back in the street and set up his laser level to see just what he needed to do. He used the front loader to move the gravel around and distribute it evenly and finished by back blading it with the bucket to level it.
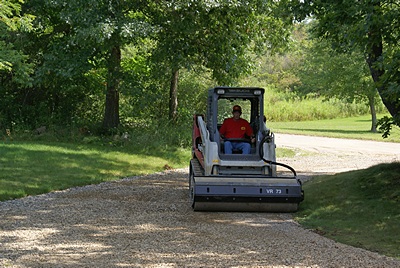
Rolling and compacting the driveway.
Once he had the gravel the way he wanted it, he removed the bucket and attached the vibrating roller/compactor. He went over the driveway several times, always making his final pass going backwards while pulling the roller to smooth out the tracks created by the machine’s drive treads. The roller/compactor worked the fines down into the base and by the time he was done the driveway looked and felt tight; even better than last year when Phil did not yet have this attachment. The machine also shook the entire house, especially the rear deck which is mostly supported by tall 6×6 and 4×4 posts. He indicated that we did not need to wait for rain, or anything else, before putting the bus back in its spot, so after he left that is what we did.
But before Phil left, he used his laser level to check the grade in the back. Although it does not appear to the naked eye to drop very much in the first 70 feet, the laser level indicated that there was a steady down slope over that distance with a total drop of over 1 foot. He checked all the way to the edge of the cattails marsh, at which point the ground was down 4-5 feet from the deck. The surface of the neighbor’s pond looks to be at least two feet lower from there.
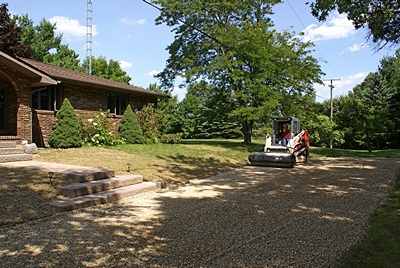
The compacting roller really makes a difference.
There are several implications to this. For one, it means the surface of the pond is well below our basement slab (6 – 7 feet) and at least 2 feet below the bottom of the footings for our house, so it is probably not the source of the water that runs into our sump. It also means there is adequate grade to allow surface water to run off once the grass grows in (although it would be better if there was more grade than there currently is in the first 50 feet). Equally important, the grade is more than adequate for a very effective French drain should we decide to have Phil pull up the existing drain lines and replace them. Finally, having a hole dug at least 8 feet deep for the ham radio tower base should not pose a problem as the starting elevation is at least 6 feet above the basement slab.
With regards to the tower base, Phil suggested that I have the rebar cage, mounting bolts, and alignment structure built ahead of time and ready to go. He could dig the hole first thing in the morning with his mini-excavator (up to 8’ deep) and figured it would only take an hour at most. The assembled rebar could be positioned, plumbed, and secured in an hour or so, and the concrete could be delivered and poured in the late morning. He indicated that spreading the work out over more time than that, especially letting the hole sit overnight, was not a good idea
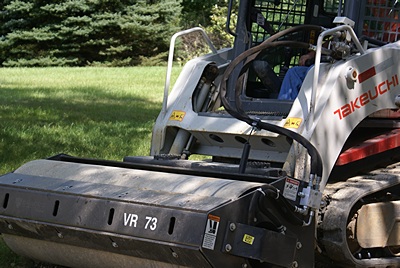
Close up of the compacting roller attachment. This thing shook the whole house!
We discussed how to get the concrete into the hole given its location about 40 feet northeast of the northeast corner of the house. Our two options appear to be the little dump carts or a pumper. The carts would have to drive up the east side of the house between the house and the septic tanks, but Phil thought that would be OK as long as they put down plywood to drive on. He said a pumper truck would be very expensive but that a separate pump is available that can be towed to the job site. With that equipment the concrete mixer truck would simply unload the concrete into the pumper, which would then pump it to the hole. Both the truck and the pumper would be in the east end of our pull-through driveway. Phil suggested that I call Carl Russell in Byron, Michigan as he is a good concrete guy and probably has a concrete pump.
After Phil left we reversed our earlier steps and moved the bus back into the pull-through driveway. It rolled right up onto the level pad area and did not leave any noticeable tire tracks. Nice. We hooked up the “50 Amp” shorepower cable, turned off the chassis batteries, checked that all of the battery chargers were working, and shut/locked everything.
While Phil was working, Linda went to the Howell Library to return children’s books and came back with a card for the Howell Melon Festival. The Festival started today and runs through Sunday. She wanted to go walk around so we skipped dinner and headed out around 5 PM. At the first turn in our road we encountered two workers from Roese Construction. They were working on installing the natural gas main line down the street and said another crew would be coming along behind them in 1 – 2 weeks doing the branch runs up to the meters on the houses.
The Howell Melon Festival was just getting started when we got there but parking was already at a premium. We parked a few blocks away in an empty church parking lot. Some of the smaller side streets were already blocked off but Grand River Avenue and Michigan Avenue were both still open to traffic. They will be closed tomorrow and Sunday and filled with vendor booths.
The weather was perfect and all of the downtown restaurants were very busy with lots of outside seating. In the 16 months we have lived in the new house we have never really visited most of the downtown Howell merchants. We went into Country Squire, a business that sells fireplace logs and inserts as well as outdoor cooking grills. They had a couple of natural gas fireplace logs that were 99%+ efficient and did not require the flue to be open. We thought they were a bit pricey but they were actually capable of heating a room. We don’t use our existing propane logs because they are mostly decorative and require the flue damper to be open, which just wastes fuel and money. The Country Squire also had a couple of natural gas grills that would mount to our deck and attach to our existing quick disconnect.
We walked through the food vendor area but did not see anything that interested us. After walking past the starting gate for the Howell Melon Run we ended up at Uptown Coffee, on the northeast corner of Grand River and Main, where we had some brew and Sabra hummus with pretzel chips. We started back towards our car and paused at the Old Courthouse long enough to hear the first number by the band. They sounded good and not too loud. We had our folding camp chairs in the car but decided to pass on the concert.
We stopped at Walmart on the way home to buy a microwave popcorn popper bowl and stock up on flavors of ICE brand sparkling flavored water. Meijer’s sells a few flavors but Walmart has the broadest selection, including my two favorites (pineapple-coconut and blueberry-pomegranate). Our final stop was at Lowe’s for a 100-pack of bright orange marker flags. I will use these to mark the powerline that runs under the driveway to feed the RV outlet, the propane line to the house, the drain pipe from the corner of the house into the first septic tank, and the drain pipe that connects the outlet of the second septic tank to the beginning of the drain field.
It was a long day but a good one. We watched another episode of Doc Martin and then called it a night.